SUPPLY LIST:
- A room (box)
- LED chandelier
- Trim (washi tape)
- 2 pieces of furniture
- 2 sheets of wallpaper (scrapbook paper)
- Wood flooring (veneer sheet)
- Decorations kit:
- Planter (geometric bead) with wheat grass
- Picture frame (price tag)
- Picture hanger (push pin)
- Chandelier hanger (paperclip)
- Upholstery kit:
- Fabric
- Felt
- Braided cord
- Cotton balls
- Glue dots (for adhering wallpaper)
- Wax paper
- Tools:
- Paintbrush
- Tacky glue
NOT INCLUDED, MUST SUPPLY YOUR OWN: Creativity! (Also: a small picture/drawing of your choosing; scissors; and maybe a stapler.)
HOW TO MAKE:
A ROOM (walls, floors, trim, chandelier) (Fig. 1-11):
- Cut off the lid of the box, making a clean line. (Fig. 1)
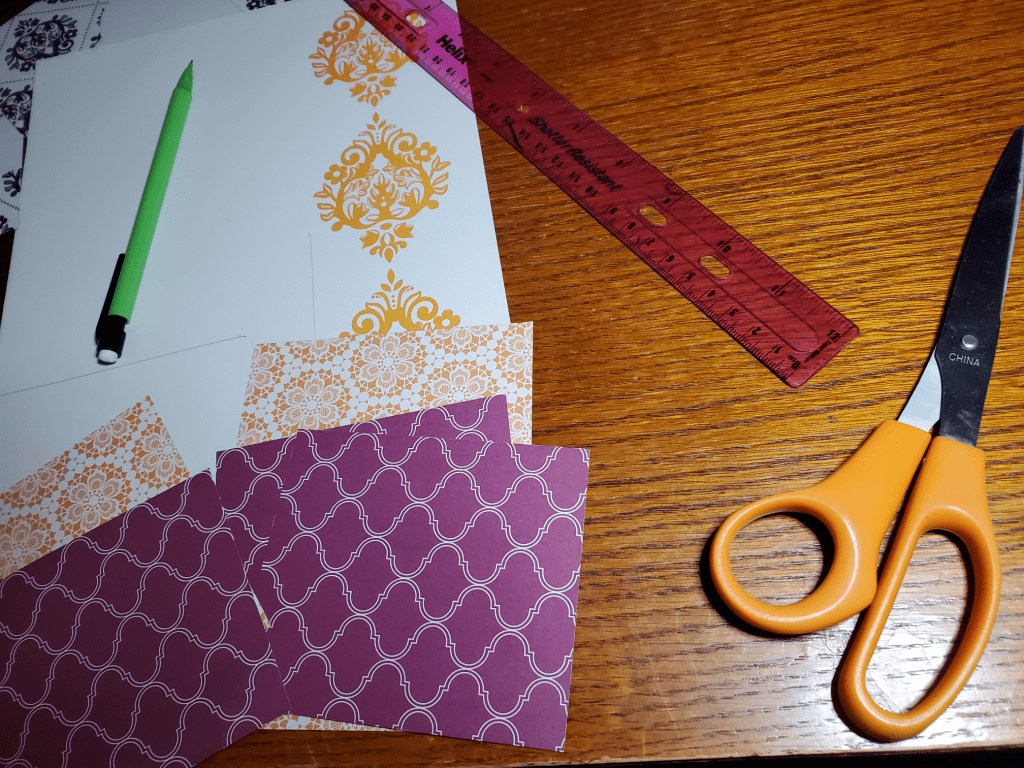
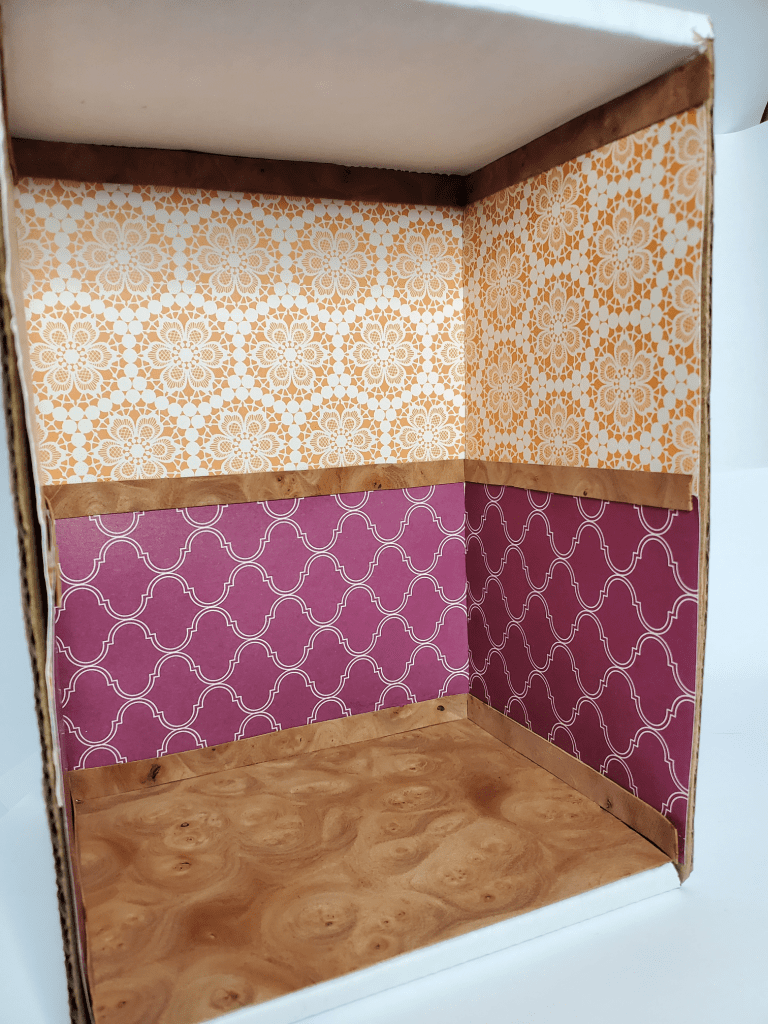
- Use the box to mark your wallpaper and flooring to size, then cut to size. This is when you’ll decide whether or not to use 2 wallpaper patterns, if you want wainscoting/trim, etc. You can use either veneer scraps or washi tape for trim. (Fig. 2-4)
TIP: You can use prepared pieces to measure other pieces!
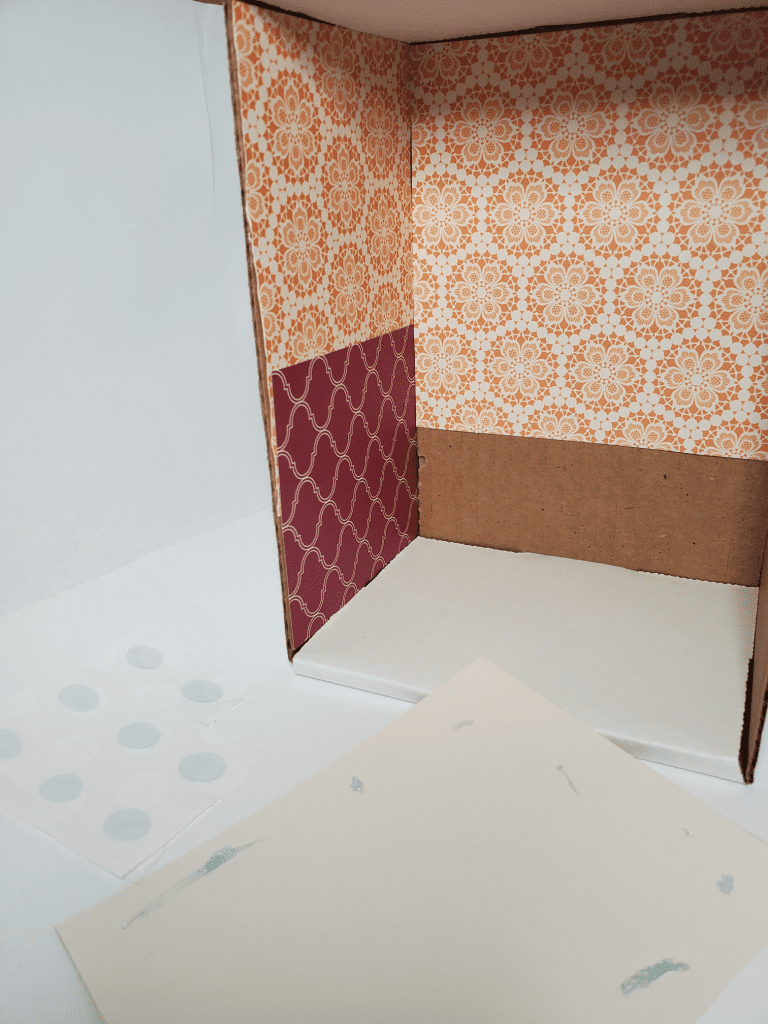
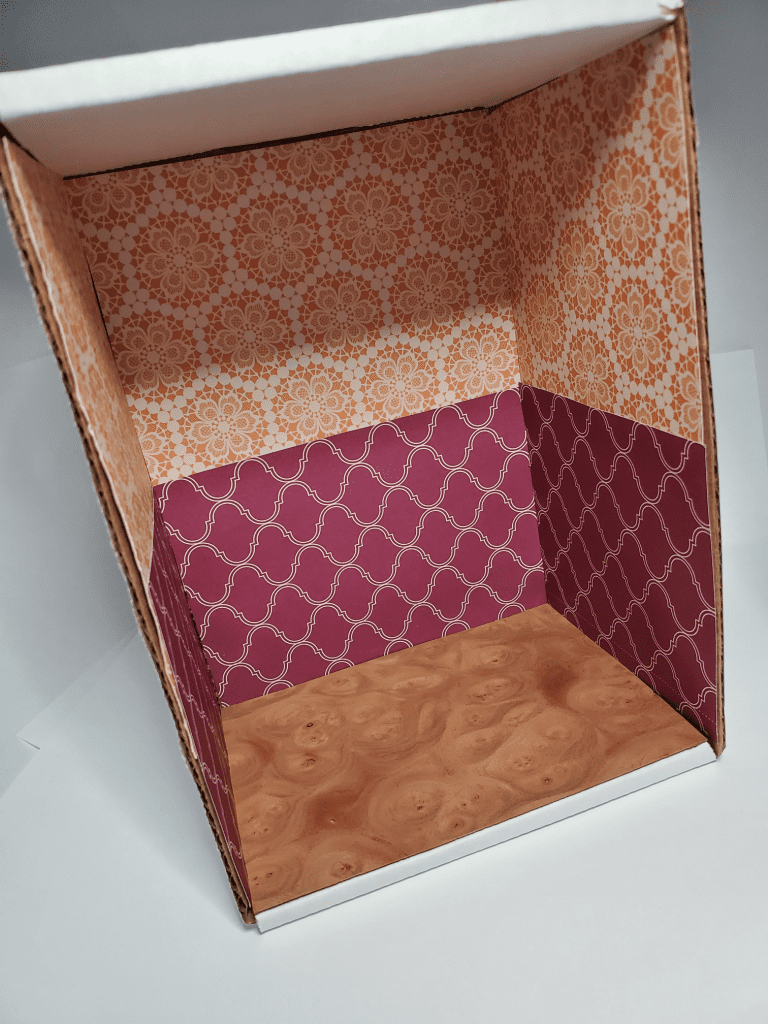
TIP: You can slide in the wallpaper for a snug fit, decreasing the amount of adhesive needed in the next step. - Use the glue dots to adhere the wallpaper, flooring, and trim to the box. Use tacky glue, applied with the paintbrush, if necessary (useful for wood trim). (Fig. 5-7)
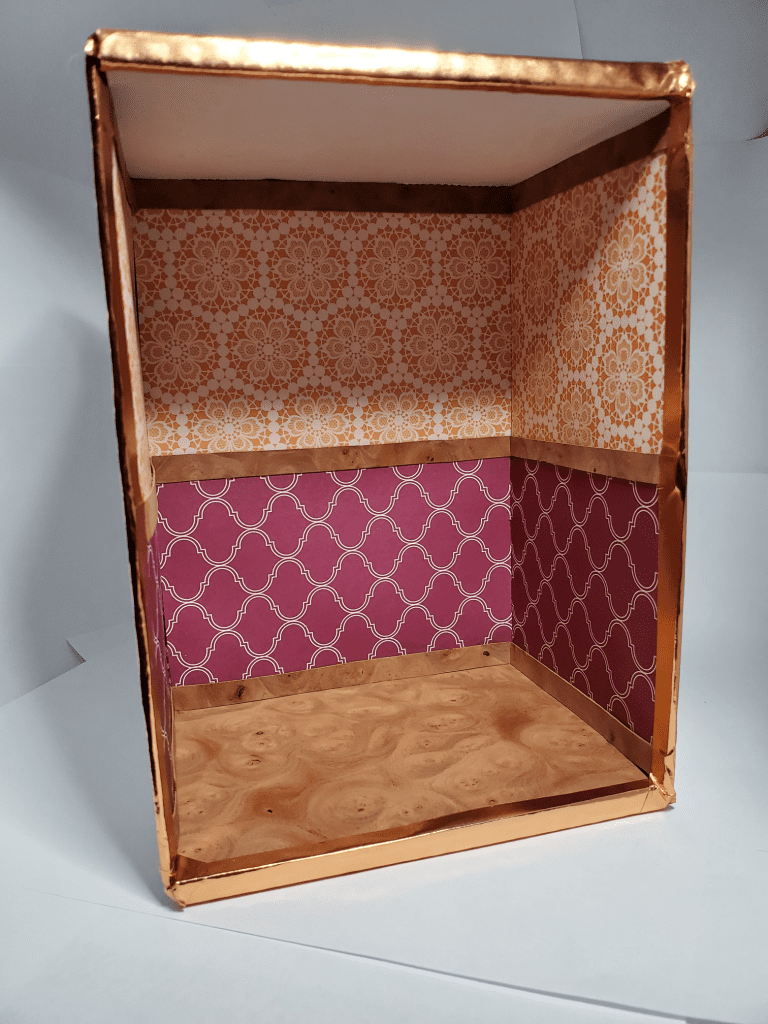
- Use the washi tape to decorate the edges of the box. This also helps keep all the wallpaper and flooring together. (Fig. 8)
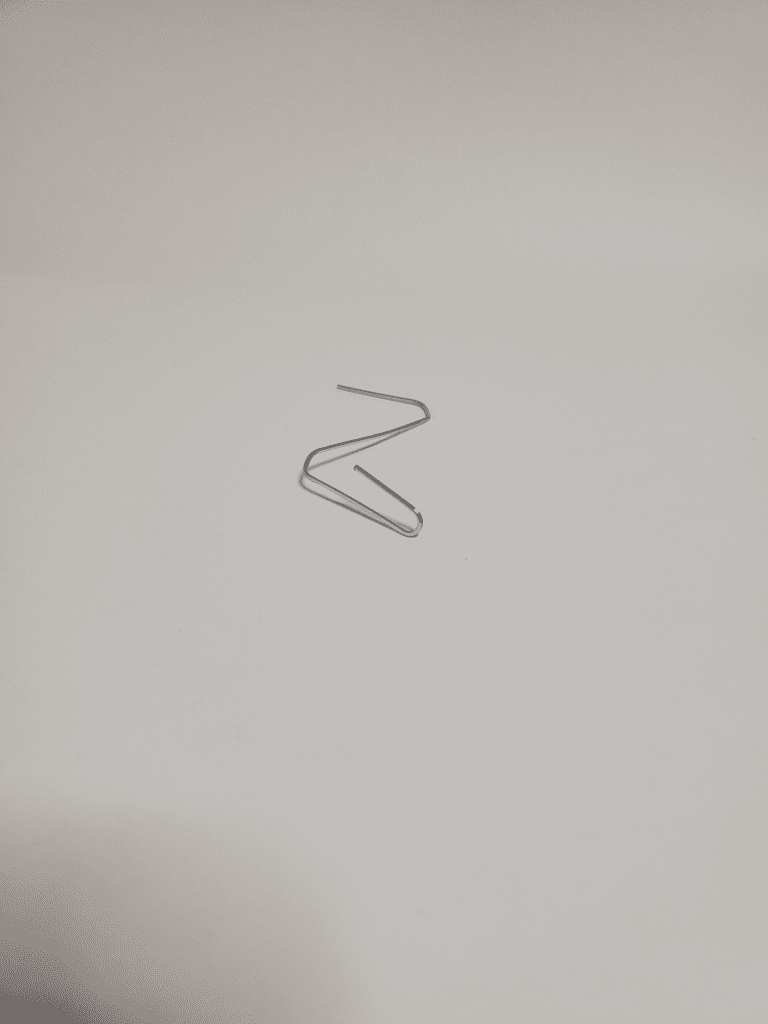
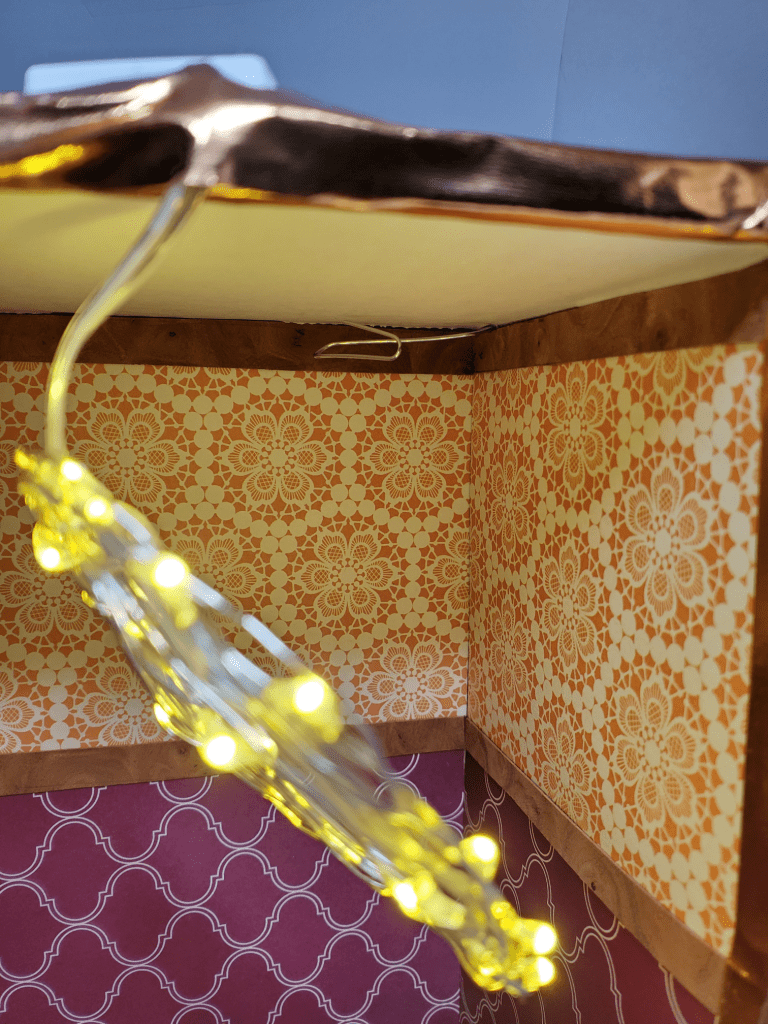
- Time to turn on the lights! Bend the paperclip so that you have a curved hook on one end. Carefully wedge the straight end into the top crease of the box in a back corner. Place the light control on top of the box and secure with washi tape, so that the light is hanging off the top of the box. Hook the light loop onto the paper clip. (Fig. 9-11)


A BRAIDED RUG (Fig. 12-17):
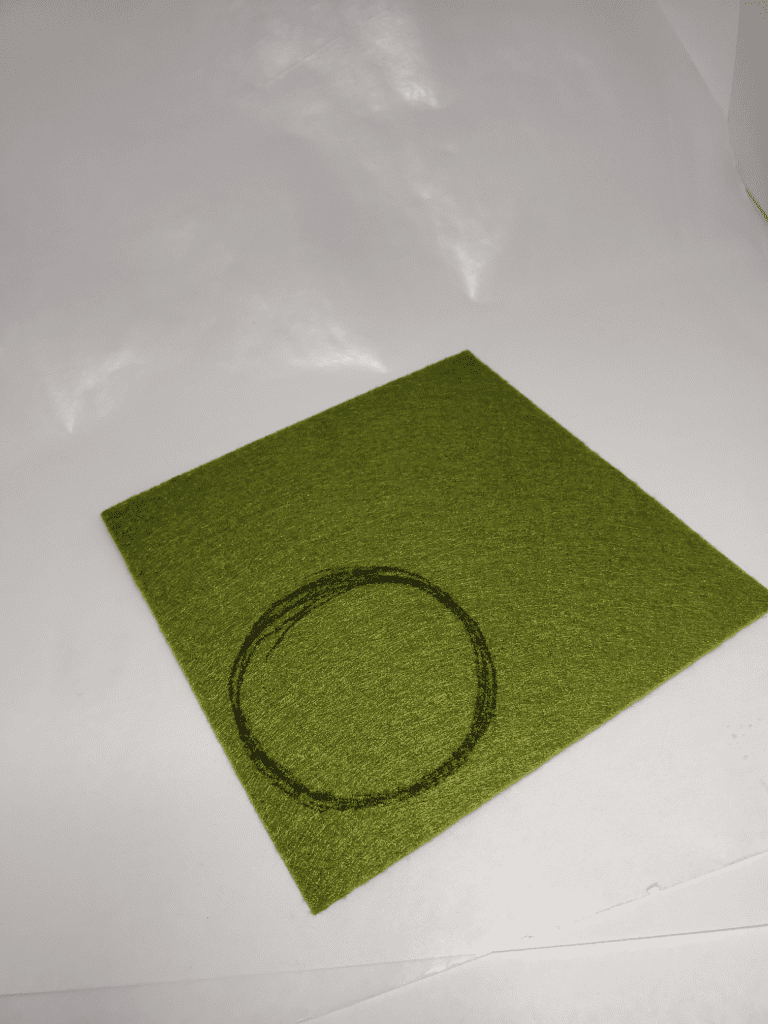
- Draw your rug shape on the felt and cut out. (Fig. 12)
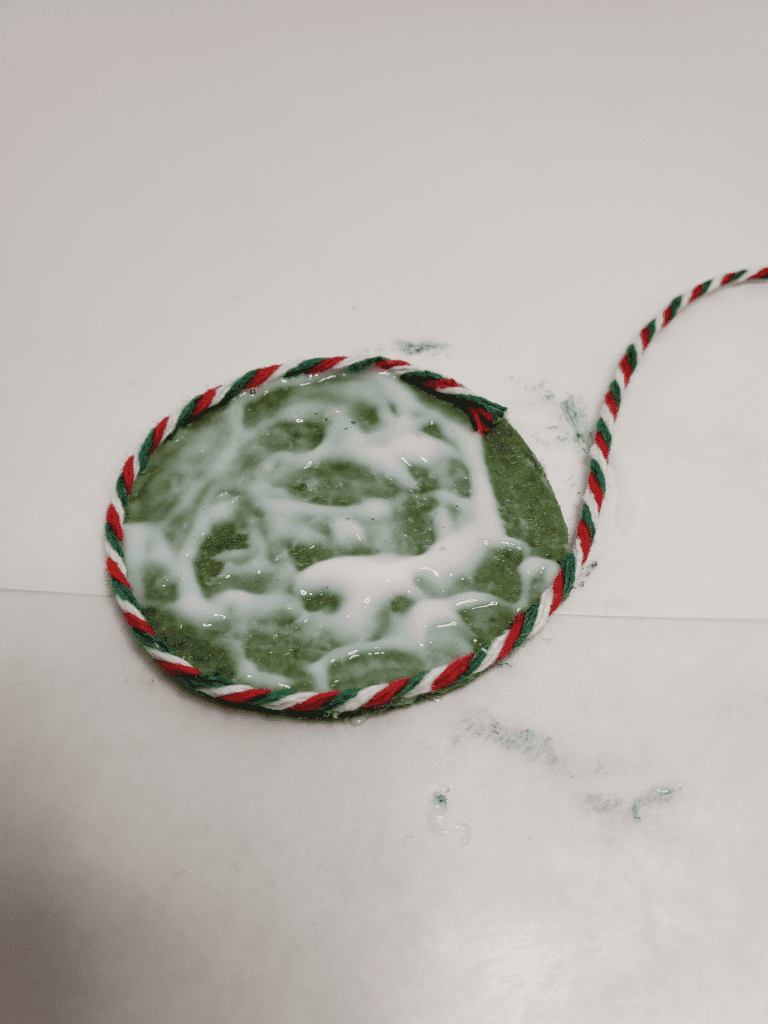
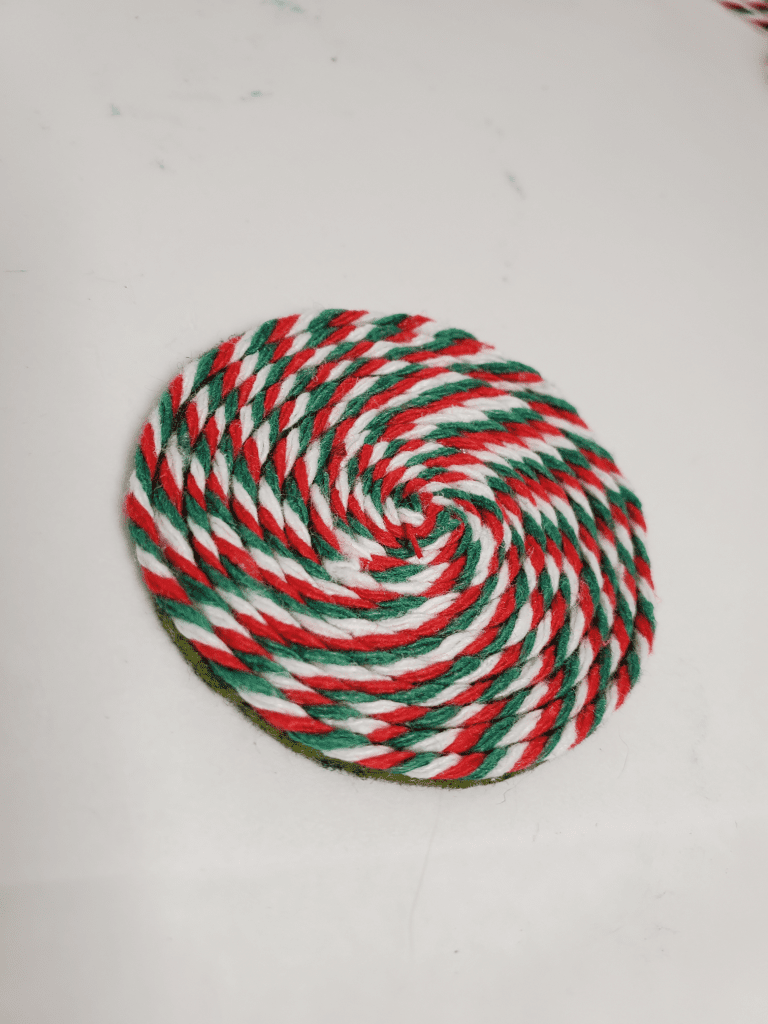
- Lay out the wax paper and place your felt piece on top. Cover the felt piece liberally with tacky glue. Starting from the outside, coil the cord onto the felt. Cut off excess and press the cord end into shape in the middle of the rug. Dab both ends of the coil with a little glue to seal. Fold the wax paper over the rug, and place a light weight on top; let dry while you finish your diorama. (Fig. 13-16)
TIP: Use the excess felt to make a blanket, or furniture covers! You can wrap the felt in a damp paper towel and microwave for 30-60 seconds to soften it for shaping. Cut slits in the ends to make a fringe. (Fig. 17)


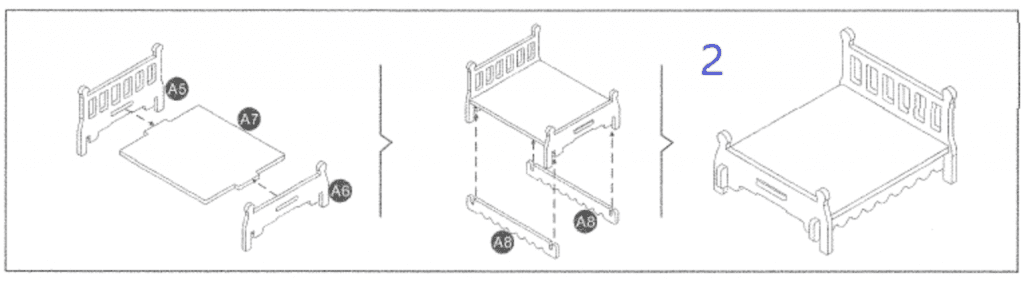
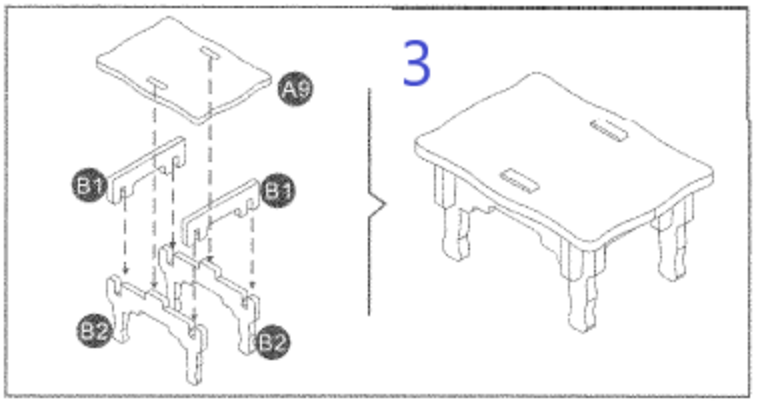
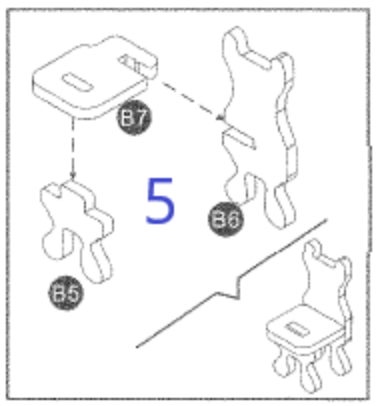
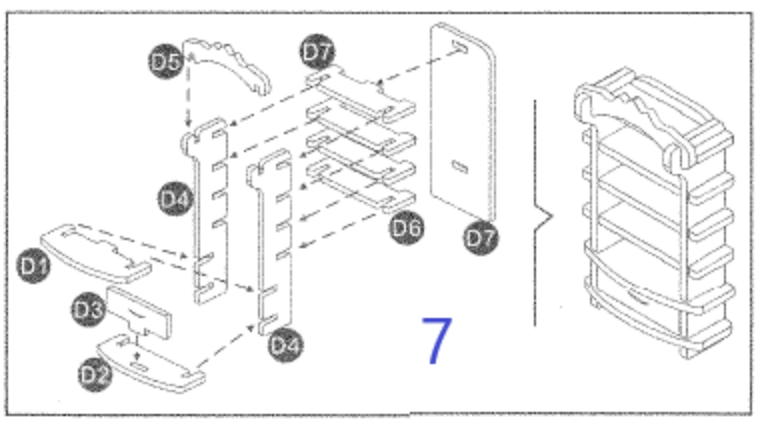
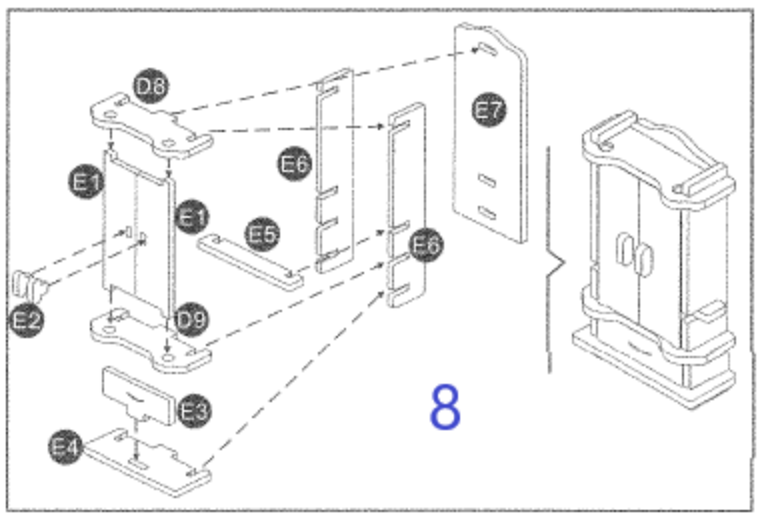
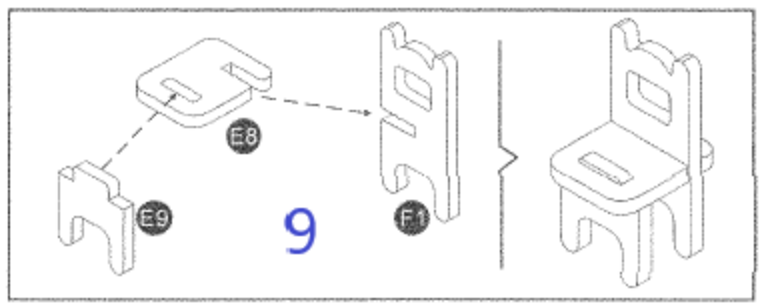
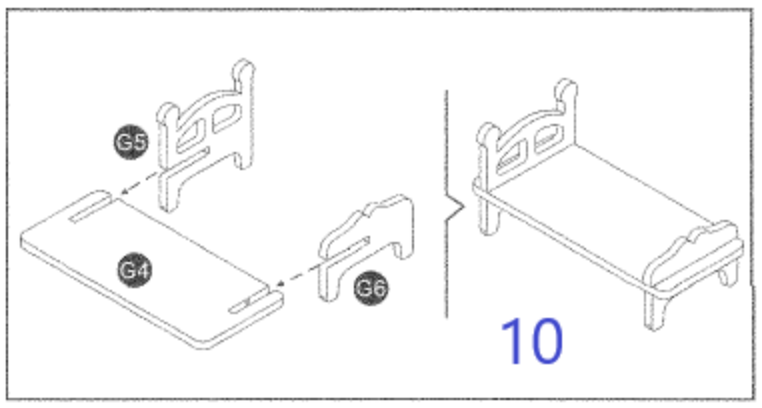
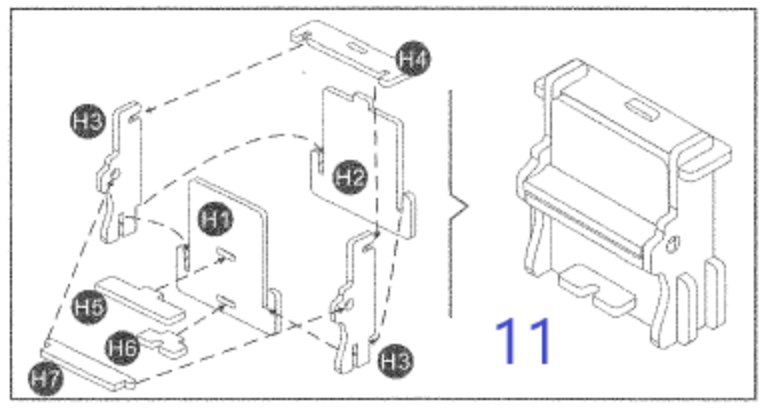
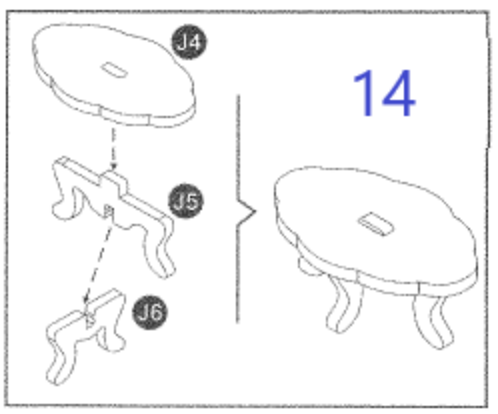
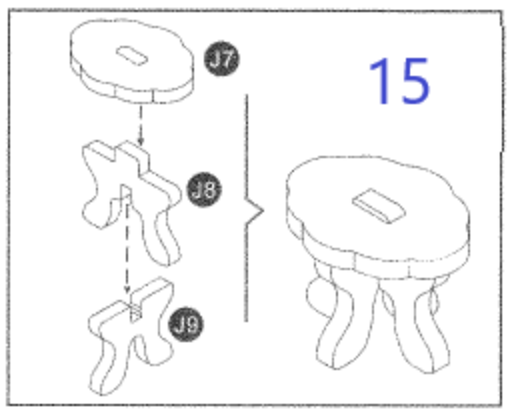
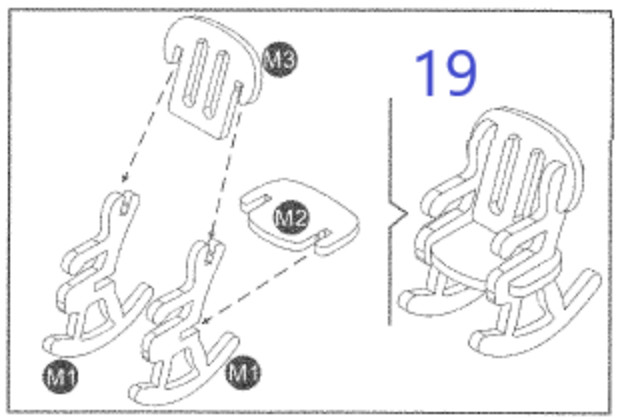
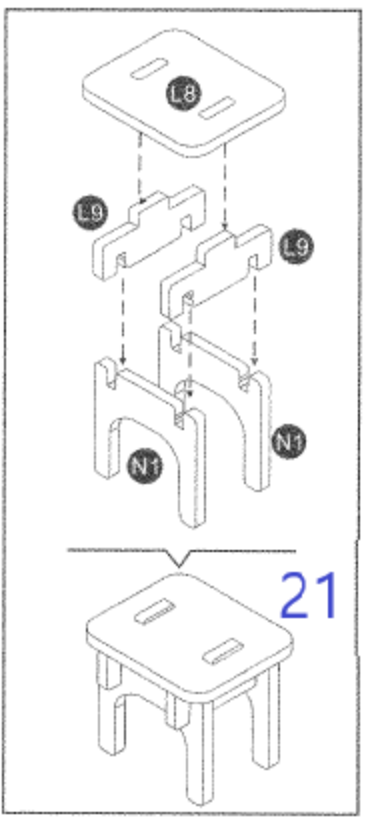
FURNITURE (Fig. 18; Furniture Instructional Image Gallery):
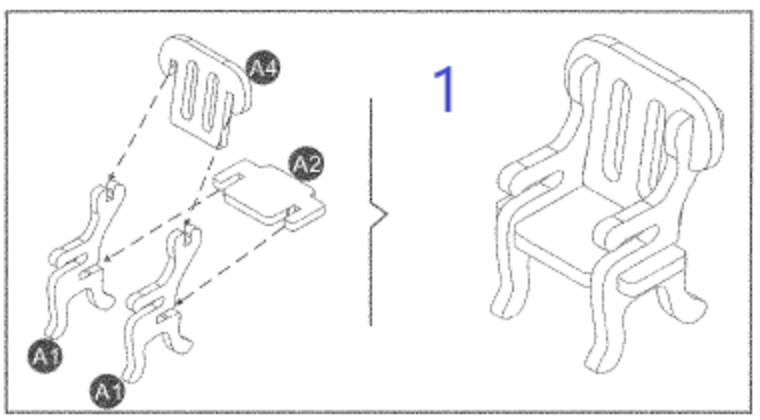
- Carefully snap together the pieces for your 2 pieces of furniture. (Fig. 18)
See the gallery for instructions; you’ll find the number of your furniture piece on the interior of the envelope tab.


A FRAMED PICTURE (Fig. 19):
- Decorate the push pin with washi tape. (Fig. 19)
- Select a photo/drawing of your choosing and cut to size. Adhere to brown price tag with a glue dot or a little glue.
- Pin the frame into your room; don’t push too much, or it’ll come out the other side! Cover the exposed point with washi tape if necessary.

A POTTED PLANT (Fig. 20):
- Unbend the wire of the wheat grass. Insert the end into the geometric bead. Bend the wire again, against the bottom of the bead. (Fig. 20)
- Curve the wire as needed to carefully wedge into a back corner of the box.

A PILLOW (Fig. 21):
- Take a shred of cotton ball. Cut a piece of fabric and fold it around the cotton. Staple closed.
- Fold over again into a bunch and staple again.
You can instead sew a pillow if you’d like!

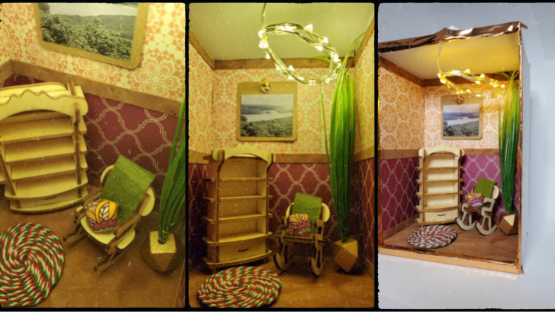
Have fun assembling your reading nook!
We hope to see some of your dioramas submitted to the Community Art Exhibit for viewing on the shelves! (Though, make sure you glue down your furniture and rug before submitting!)