THINK ON THESE THINGS:
- What is printing?
- How did people print before the digital age? Before movable type?
- How did people communicate via text/image before printing?
COOL HISTORY OF PRINTING RESOURCES!
- GRAPHICS ATLAS – a sophisticated resource that presents a unique, object-based approach for the identification and characterization of prints and photographs.
- PRINTMAKING (Khan Academy / MoMA) – A video playlist that introduces you to printmaking as well as the 3 main types: relief, intaglio, and lithography.
- PRINTS AND PROCESSES (Minneapolis Institute of Art) – A video playlist that includes relief, intaglio, lithography, and screenprinting processes.
MAKE YOUR OWN RELIEF PRINT!
Relief printing is printing from a raised surface. A simple example of relief printing is a rubber stamp pressed into a stamp pad and pressed onto a piece of paper. Relief printing plates are made from flat sheets of material such as wood, linoleum, metal, styrofoam etc. After drawing a picture on the surface, the artist uses tools to cut away the areas that will not print. A roller – called a brayer – is used to spread ink on the plate. A sheet of paper is placed on top of the plate and the image is transferred by rubbing with the hand or a block of wood, or by being run through a printing press. The completed print is a mirror image of the original plate.
Woodcut, a type of relief print, is the earliest printmaking technique, and the only one traditionally used in the Far East. It was probably first developed as a means of printing patterns on cloth, and by the 5th century was used in China for printing text and images on paper. Woodcuts of images on paper developed around 1400 in Japan, and slightly later in Europe. These are the two areas where woodcut has been most extensively used purely as a process for making images without text.
Think of relief printing as two simple steps:
- Make a plate
- Make prints from a plate
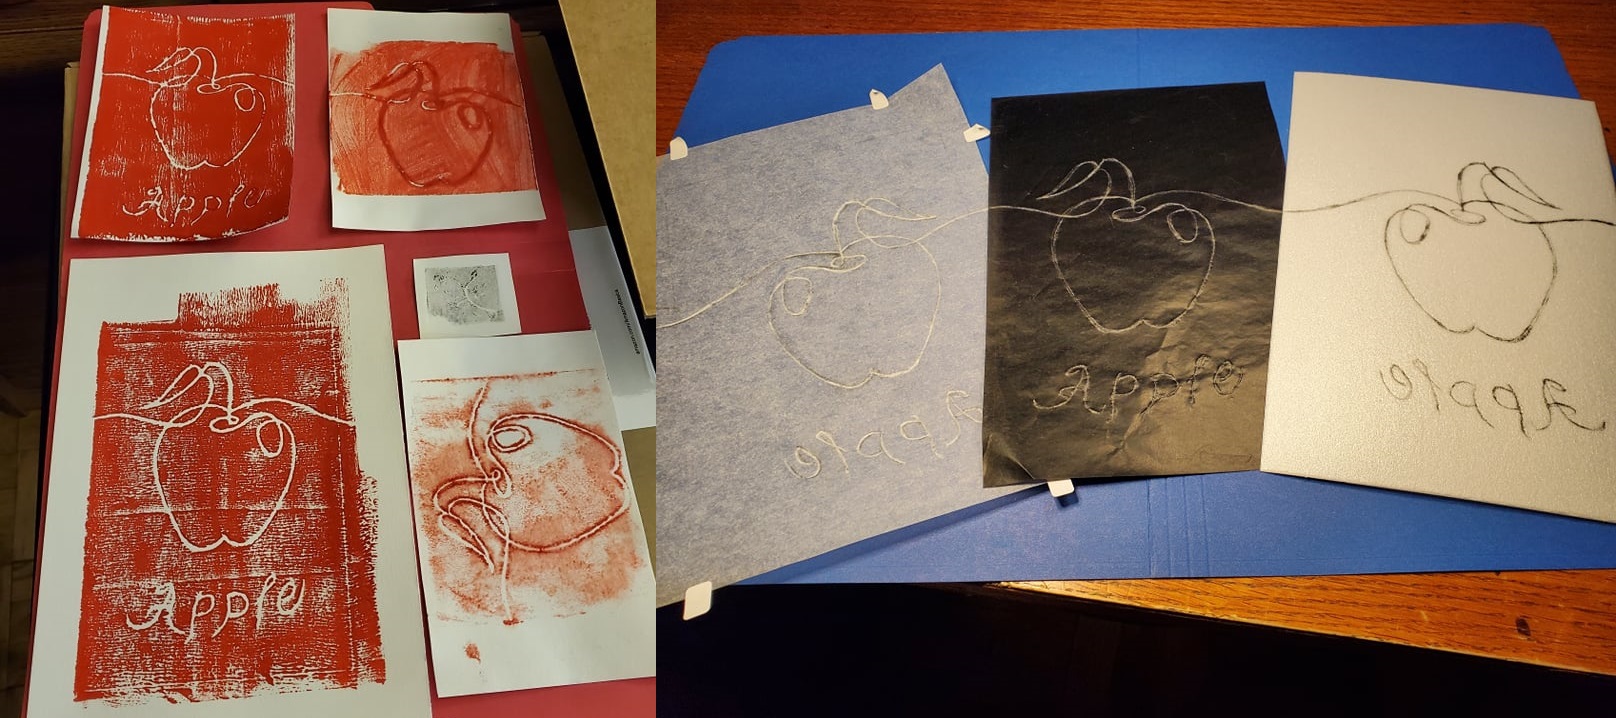
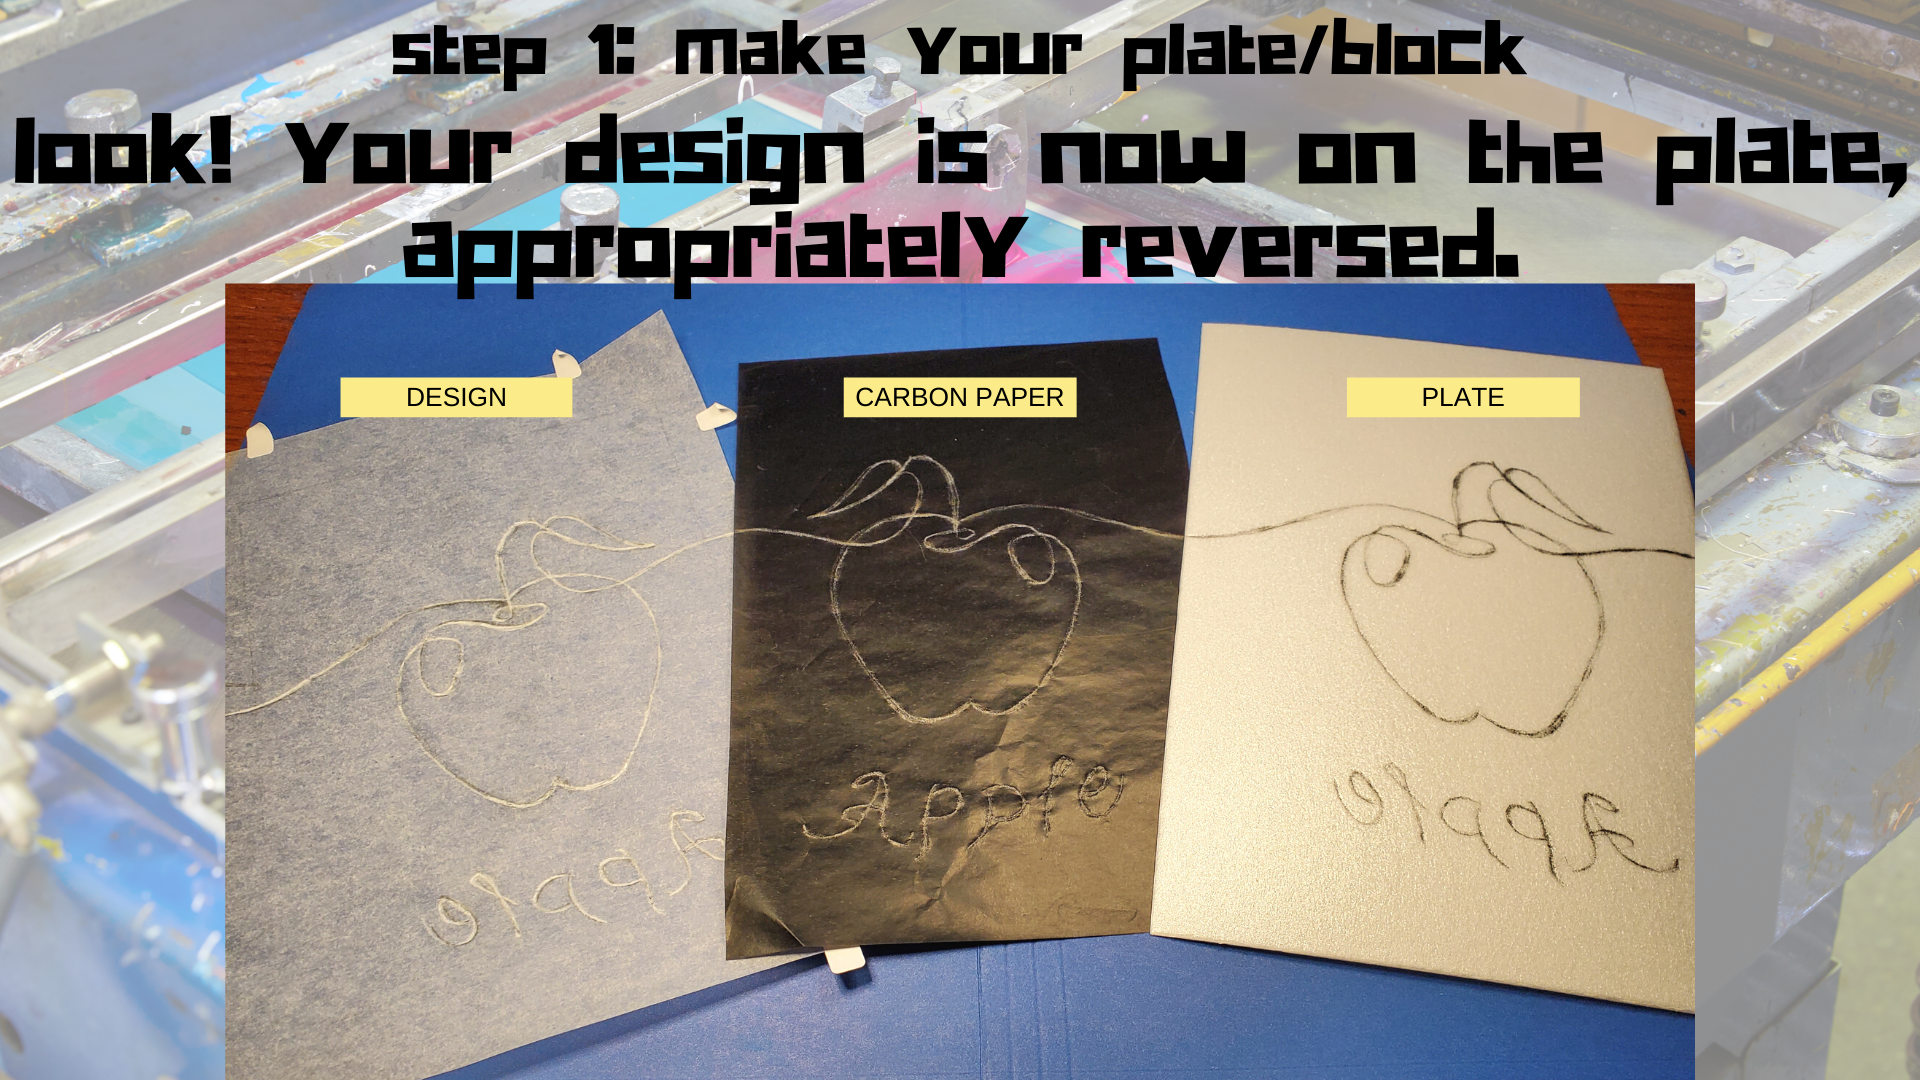
Keep in mind that your plate will be a reverse image! If it wasn’t, your print would be mirrored (ie, text would be backwards).
(You can click on these images to enlarge!)
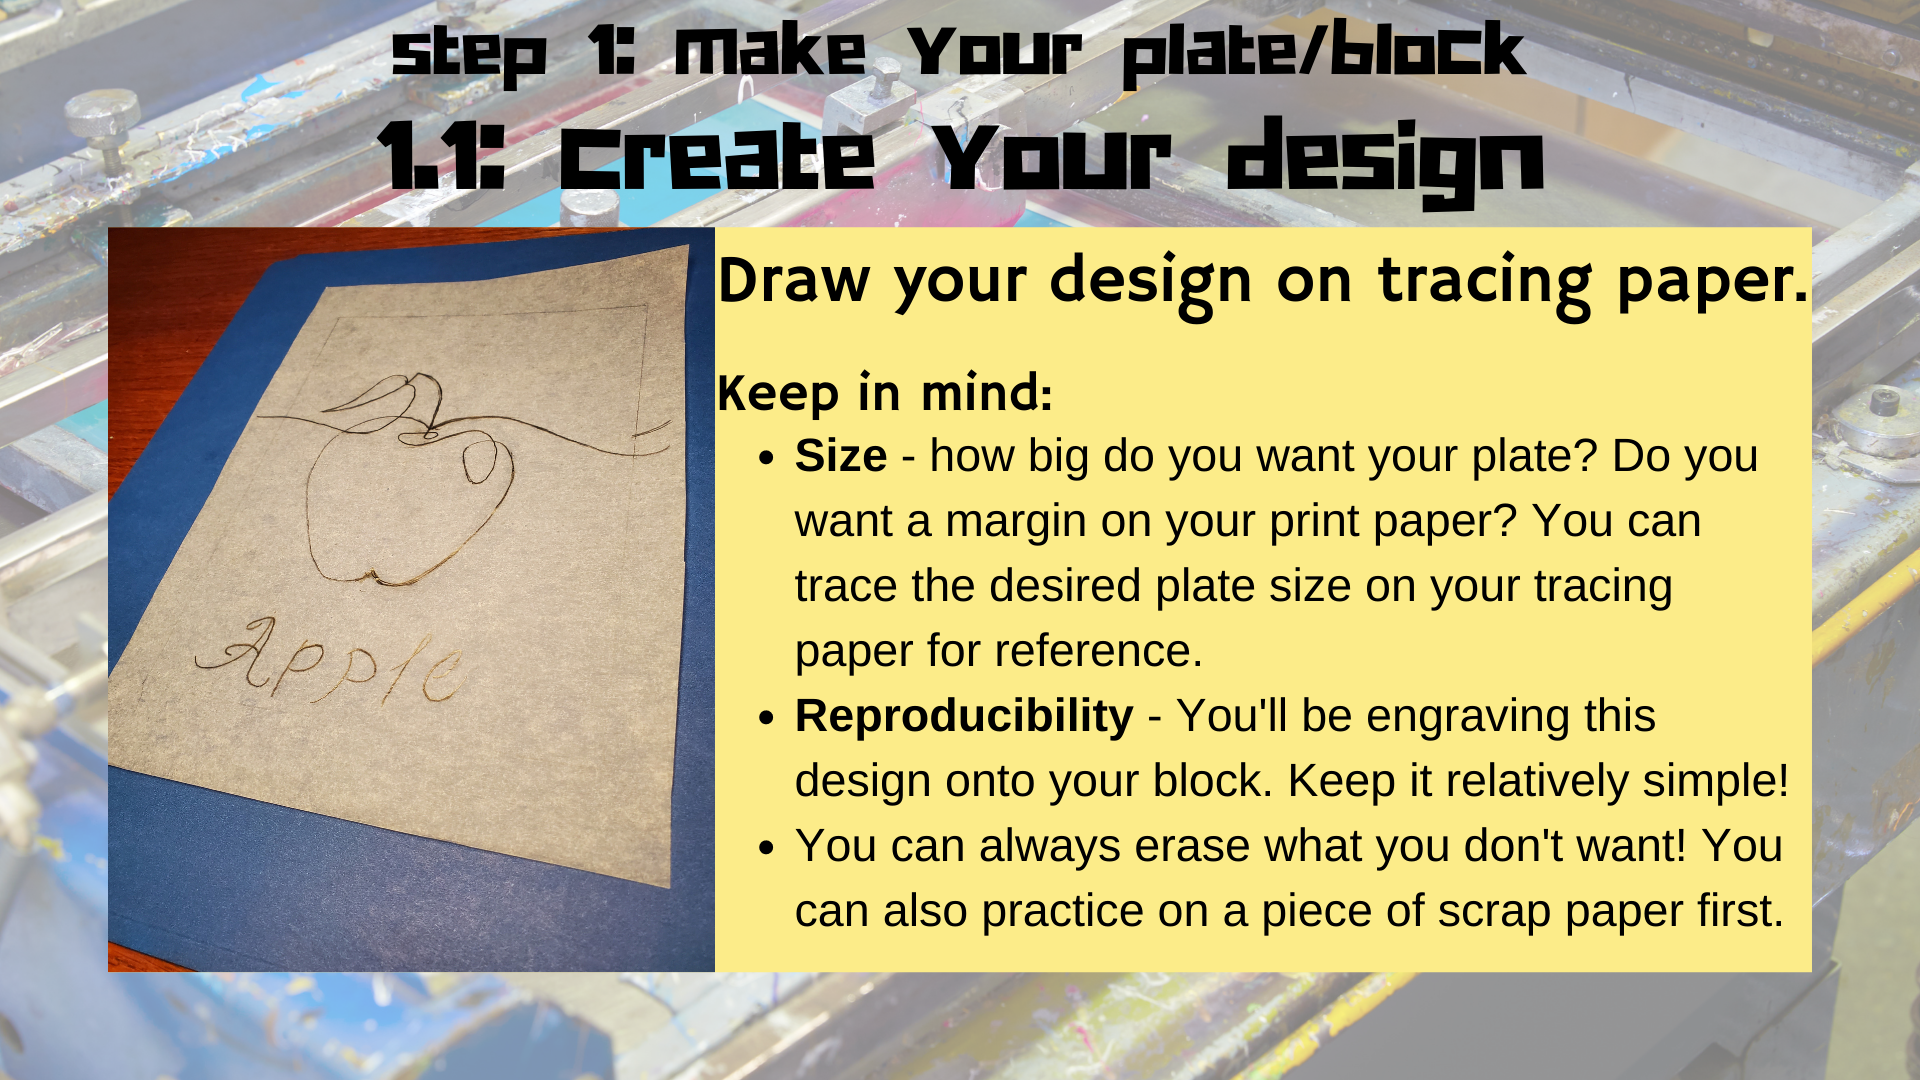
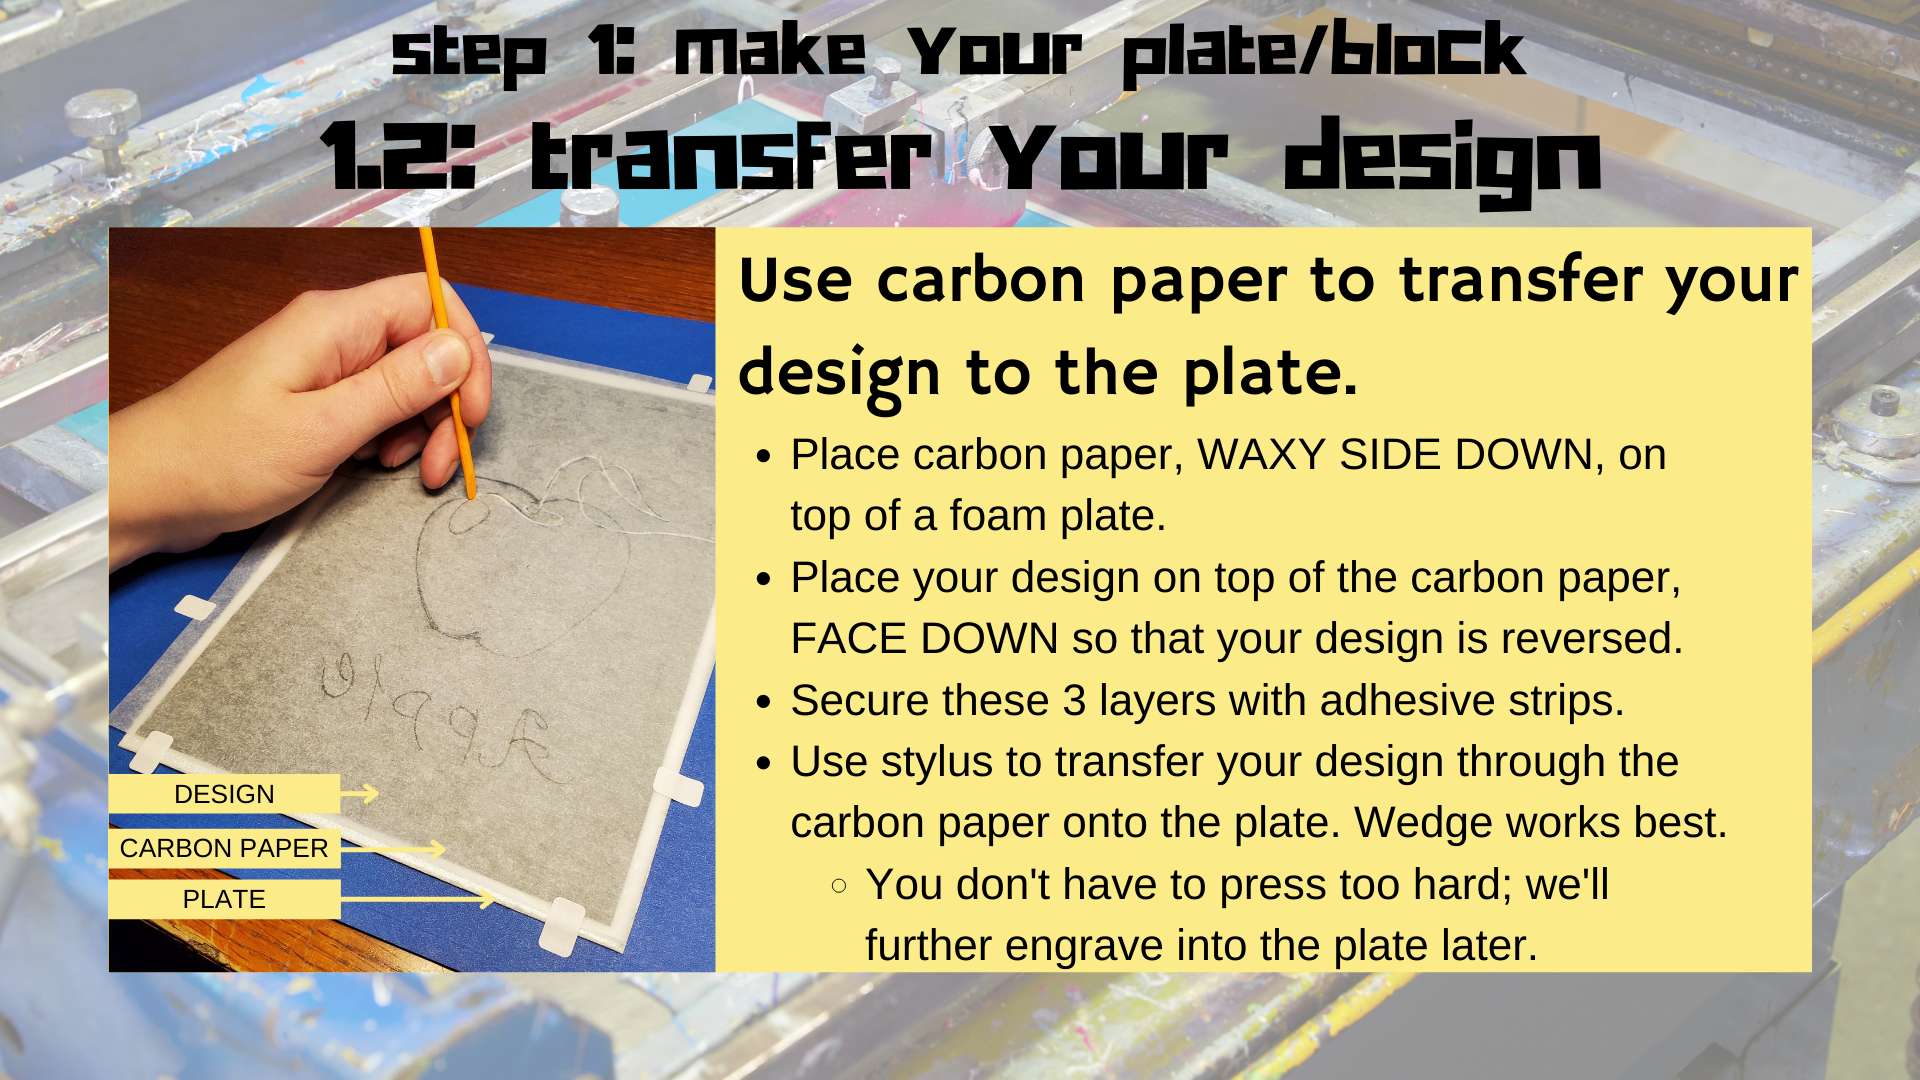
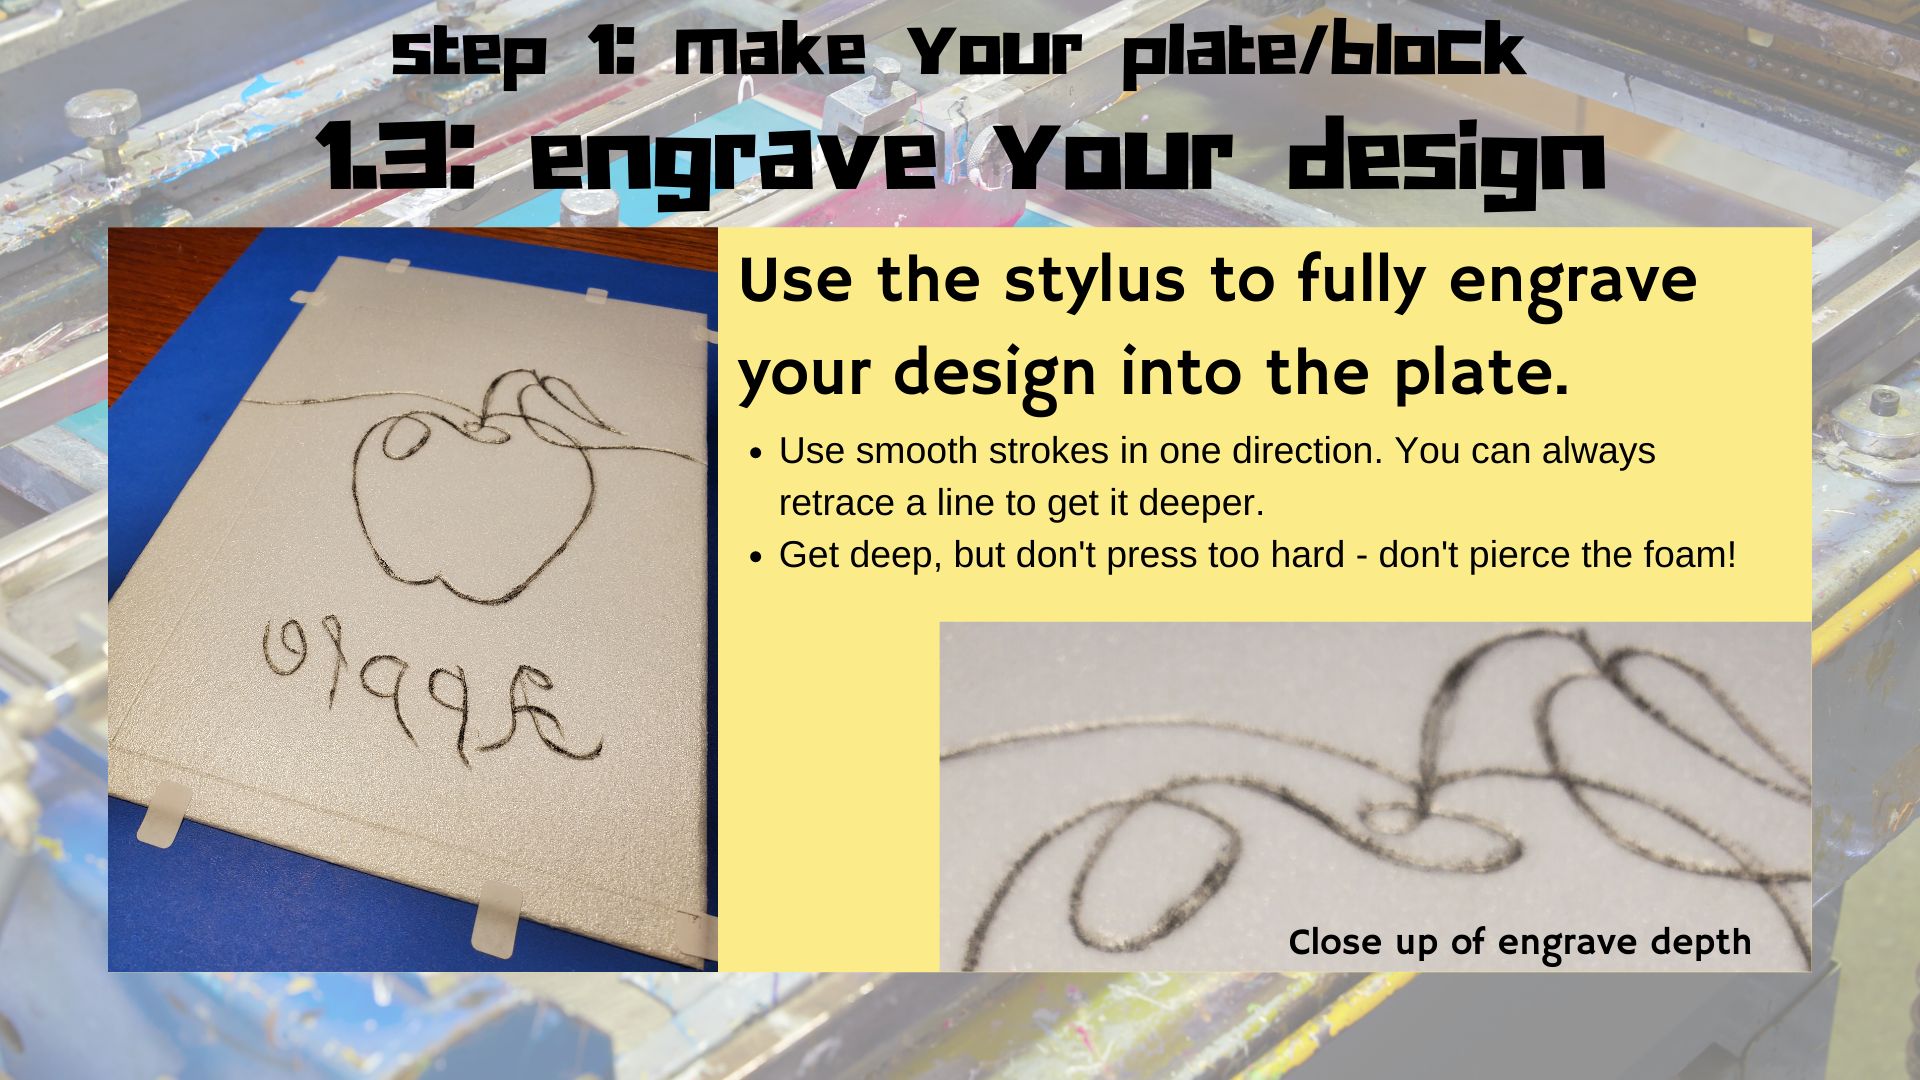
Step 1: Make your plate
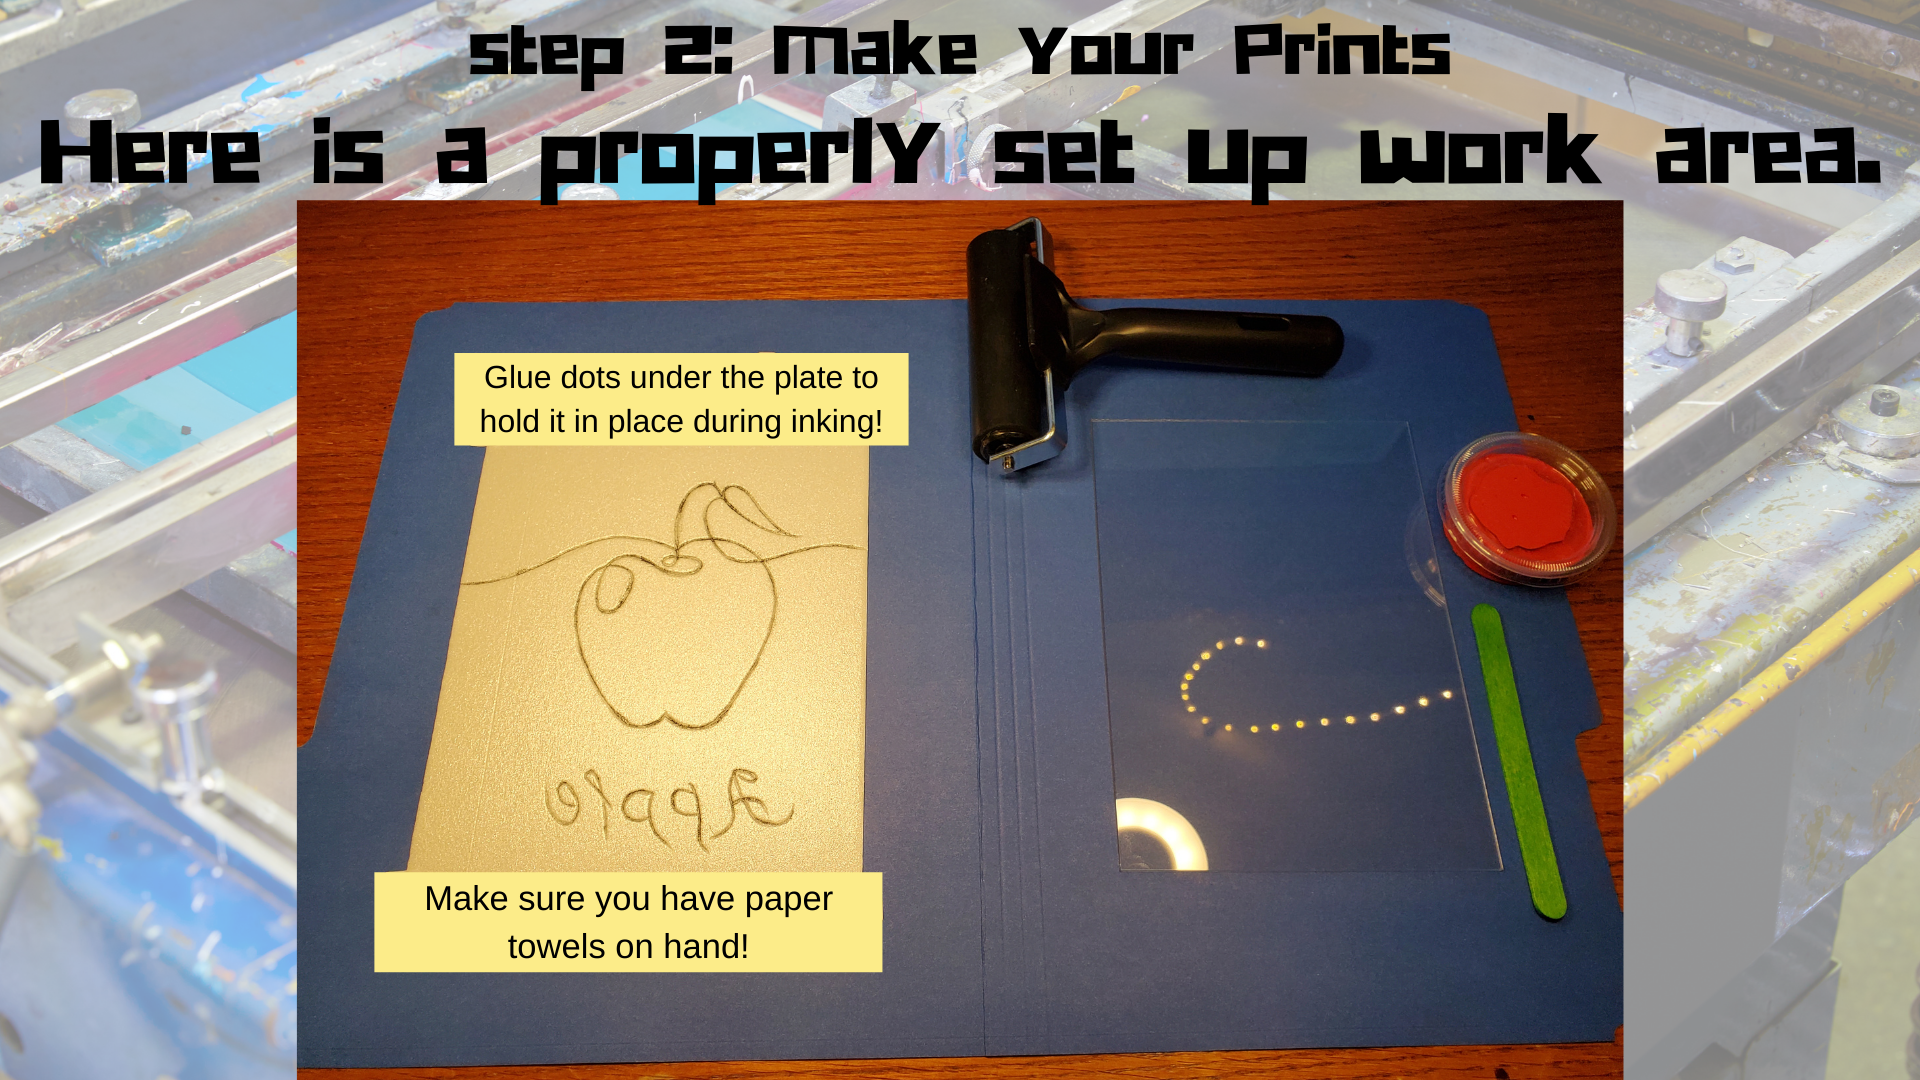
Step 2: Make your prints (Ink & Pull)
Check out this instructional video to learn how to ink and pull your prints using the plate you engraved on Monday! Note that the instructor calls this intaglio – INCORRECT! This is relief printing! But it is a good demonstration nonetheless.
The basic steps:
- PREPARE WORK AREA: Use the glue dots to secure your plate in place on one of the blue folders. Put the plexiglass on the other side of the folder; we’ll use the plexiglass as an inking plate. Make sure you have paper towels handy!
- APPLY INK TO INKING PLATE: Put some ink on the plexiglass. Roll onto the brayer. You want the roller fully covered in ink.
- APPLY INK TO PLATE/BLOCK: Use the brayer to apply ink to your “woodblock.”
- APPLY PAPER TO PLATE/BLOCK: Place a piece of printmaking or mixed media paper onto the inked woodblock. Firmly but gently apply pressure with the heel of your hand or the side of a craft stick all over the back of the paper.
- PULL YOUR PRINT: Pull the paper off the woodblock slowly, but in one motion. Leave somewhere safe to dry.
A few pointers for getting a good print:
- PROPER ENGRAVING ON YOUR PLATE: Make sure the lines of your design are well engraved on your plate. If they’re not deep enough, the lines won’t show up in the print.
- PROPER AMOUNT OF INK: Use enough ink, but not too much. When applying ink to your plate, you don’t want any white areas other than the lines of your design.
- ONLY ROLL BRAYER IN ONE DIRECTION: Don’t go back and forth with the brayer on the inking plate or on your plate/block. Move in one direction, be it up, down, left or right.
- DO NOT LIFT YOUR PRINTING PAPER AFTER PLACING ON PLATE/BLOCK: Once you have placed your paper on the inked plate/block, do not move it or you’ll get a ghost image!
- CLEAN YOUR SUPPLIES IMMEDIATELY: Ink washes off easily with hot water (not too hot though; don’t burn yourself) if you clean your brayer and other supplies right away!
Interested in Intaglio printing?
Intaglio printing is the exact opposite of relief printing. Originating in Italy, the word “intaglio,” with a silent “g,” refers to prints made from plates in which the areas that carry the ink are recessed below the surface of the plate. The plates are most often made of copper, but zinc, brass and other materials are also used.
Check out the video below to make your own intaglio prints at home! (Liz did not have great success with this method. Let us know if your project turned out!)