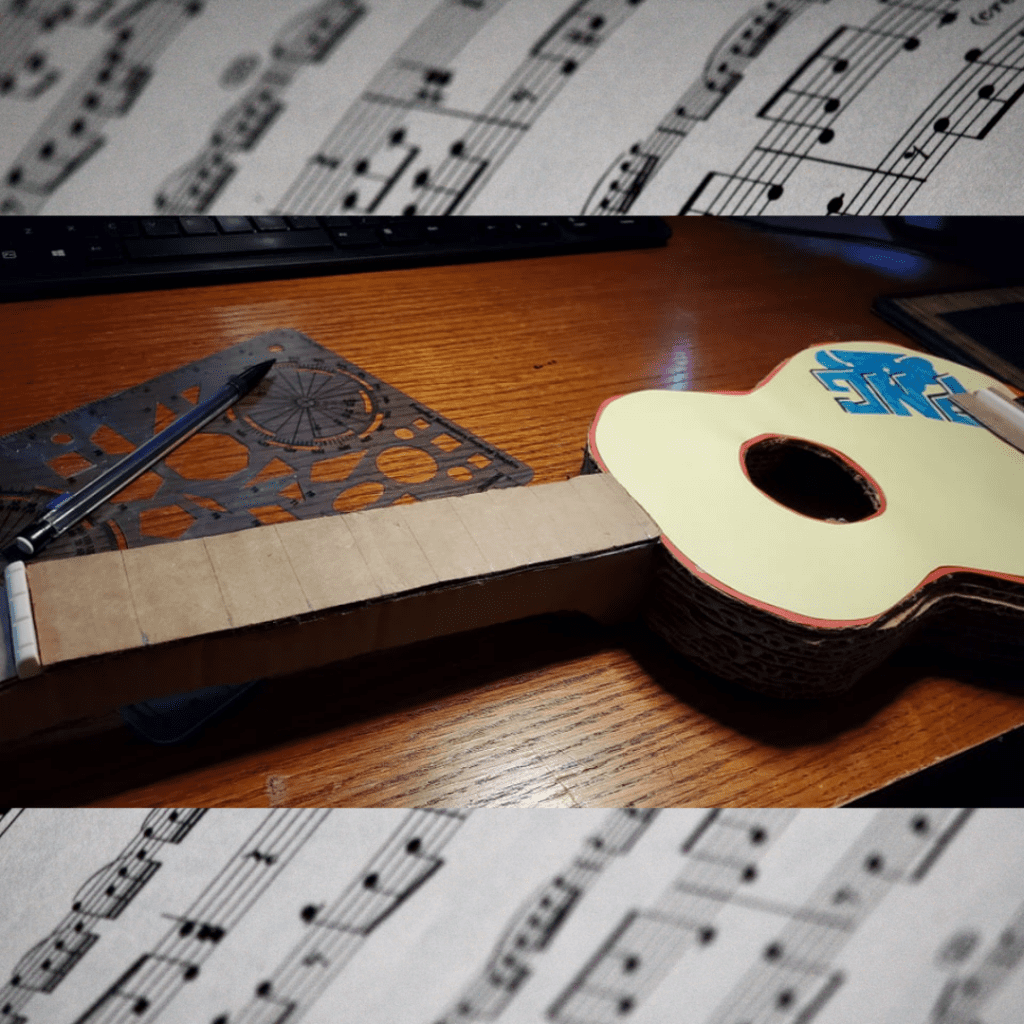
Let’s make our own, totally playable CARDBOARD UKULELE!
Remember to always be careful with tools, and ask an adult for help if you need it!
Thanks to structural engineer Rod Gunter for the templates and inspiration.
Need to see one of these how-to photos up close? Right-click the image and open image in new tab.
Ukulele Pieces:
Materials List
- Corrugated Cardboard Templates:
- 1 Body A (Top)
- 8 Body B (Middle)
- 1 Body C (Back)
- 6 Neck A (Edge)
- 7 Neck B (Middle)
- 1 Cardstock Body A (Top) template
- 1 Posterboard piece (for fingerboard and bridge)
- 1 1.5” woodscrew (for screwing neck to body)
- A lengthwise piece of cardboard (for fretboard, with extra for pieces to hold nut and saddle)
Ukulele hardware:
- 4 Tuners (with screws)
- 1 “Bridge” (metal sawtooth picture hanger with screws)
- 1 Nut
- 1 Saddle
- String set (G-C-E-A)
- 12 “Frets” (cotter pins)
Tools:
- Wood glue
- Masking tape
Tools from previous PNG kits, plus some things around the house to grab:
- Screwdrivers (1 flathead and 1 phillips)
- Scissors
- Marker
- Protractor (to use as a ruler)
- Paintbrush (for spreading glue if needed)
- Paper towels
- A large book
How to build your uke:
The Body
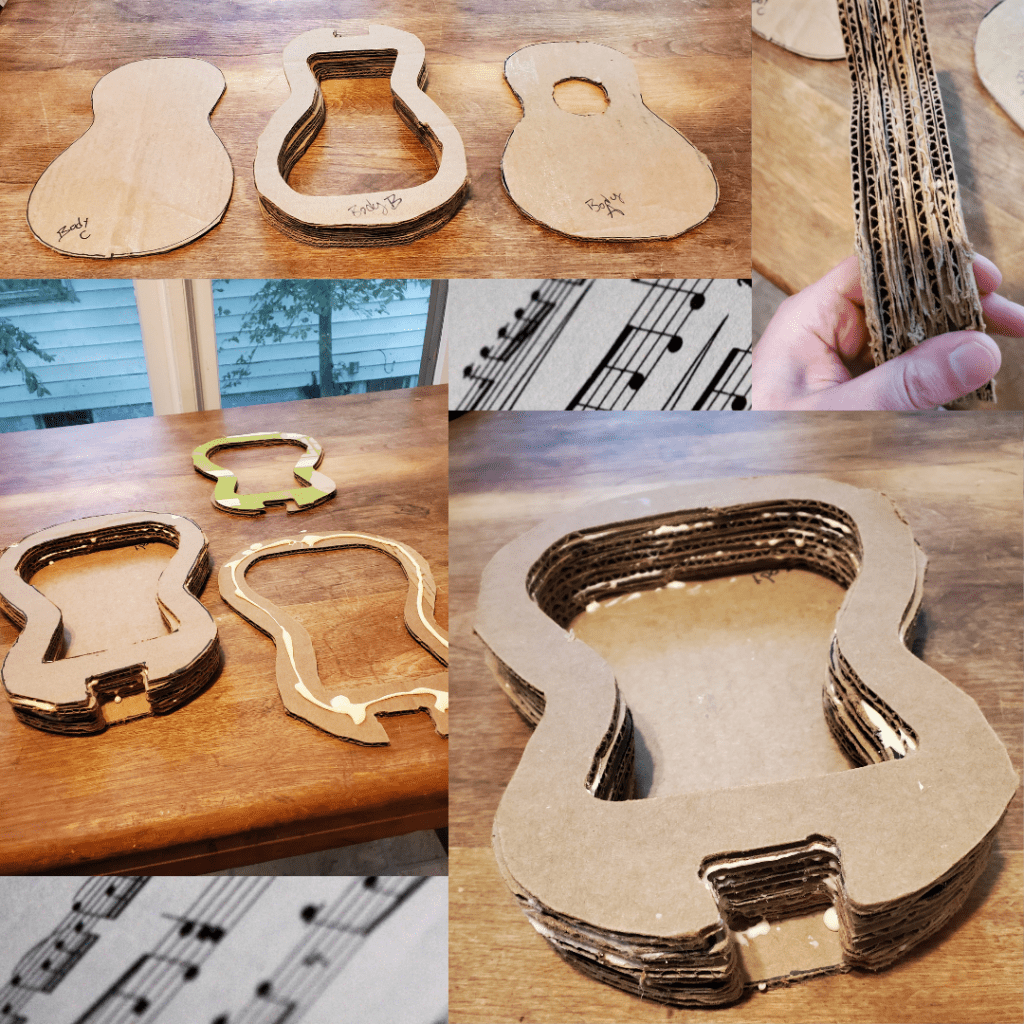
Stack & glue the back and middle pieces together (Body C & Body B).
- Note that the Body B pieces are cut in two different ways: lengthwise and crosswise. For strength, alternate these two cuts as you stack.
- Remove any stray pieces of tape before gluing.
- Using a thin coating of glue, glue each Body B piece at a time onto the Body C.
- Line up the neck notches as you go.
- Do not glue the top (Body A) to the stack! This will be done later, after the neck is attached.
- Place a book on top of the stack. Check back in a few to make sure nothing shifted.
- Decorate the cardstock top as desired & glue to the corrugated top.
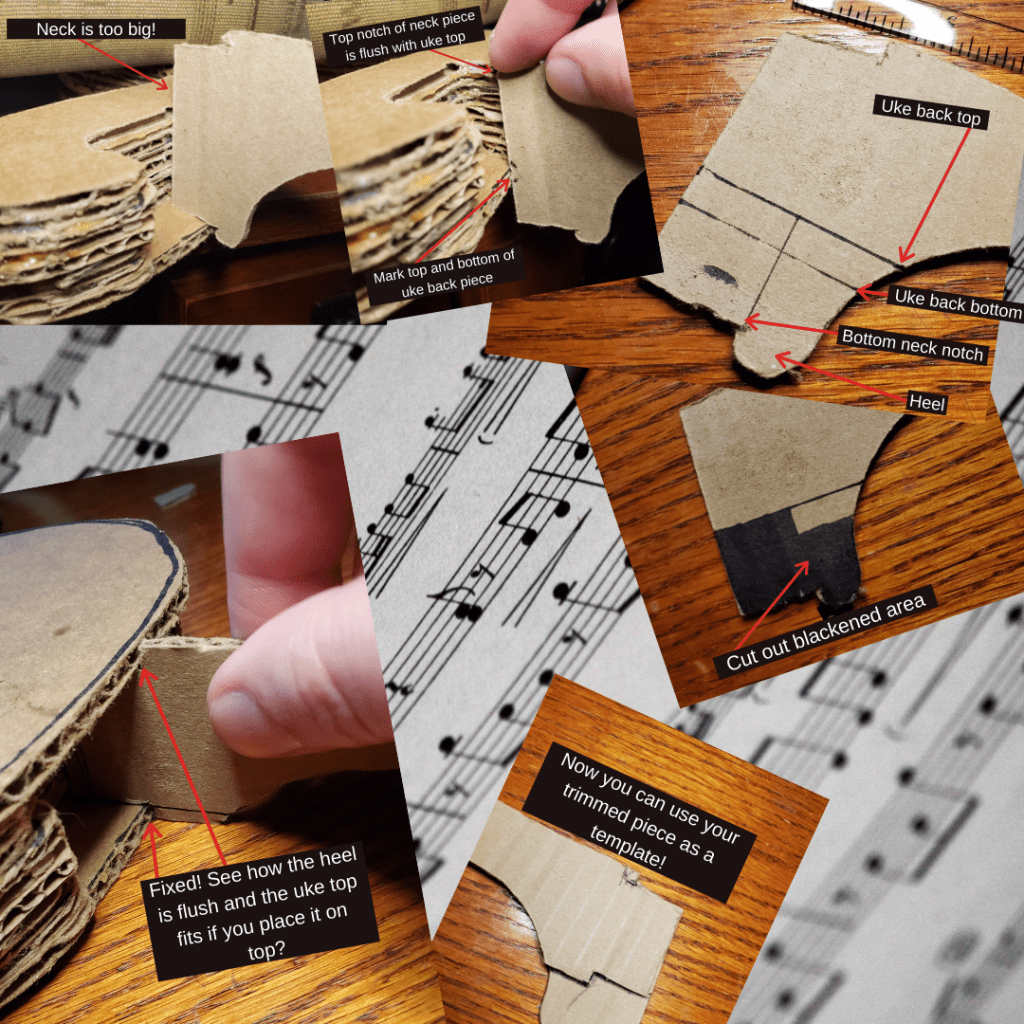
Trim Neck
The finished thickness of each uke varies, so you’ll need to trim the neck pieces to make them fit your uke. You want the top notch in the neck pieces to be flush with the top of the body. To achieve this, you’ll trim the bottom notch of each neck piece; you’ll also trim the heel to make it flush with the back of the uke.
- Before you trim, you’ll need to measure and mark where you’ll cut. Line up a neck piece to the edge of the uke’s neck notch, so that the top notch of the neck piece is flush with the top of the uke. On the neck piece, mark the top and the bottom of the back piece of the uke. Then, use a ruler to create lines from these marks. Also use the bottom notch to make a vertical line. This will create the shape that you need to cut out. (See blackened areas in photo)
- Also make sure that the headstock thickness (not the thickness of the cardboard, but the measurement from top to bottom of the cardboard) is NO MORE THAN ½ inch on each piece. Measure, mark and trim. You definitely want to do this now and not later after the neck is glued together – learn from Mis Liz’s mistakes! If the headstock is too thick, there will not be enough clearance for your strings to be inserted into the tuning pegs. (This step not pictured.)
- Once you’ve cut one neck piece, you can use it as a template for the others. Line up the top of the neck pieces and the edge that will touch the uke to make your marks. Double check each piece’s fit in the uke notch.
- Do this for all neck pieces.
- TIP: Weigh down body with a book while you’re working, so it doesn’t slide around
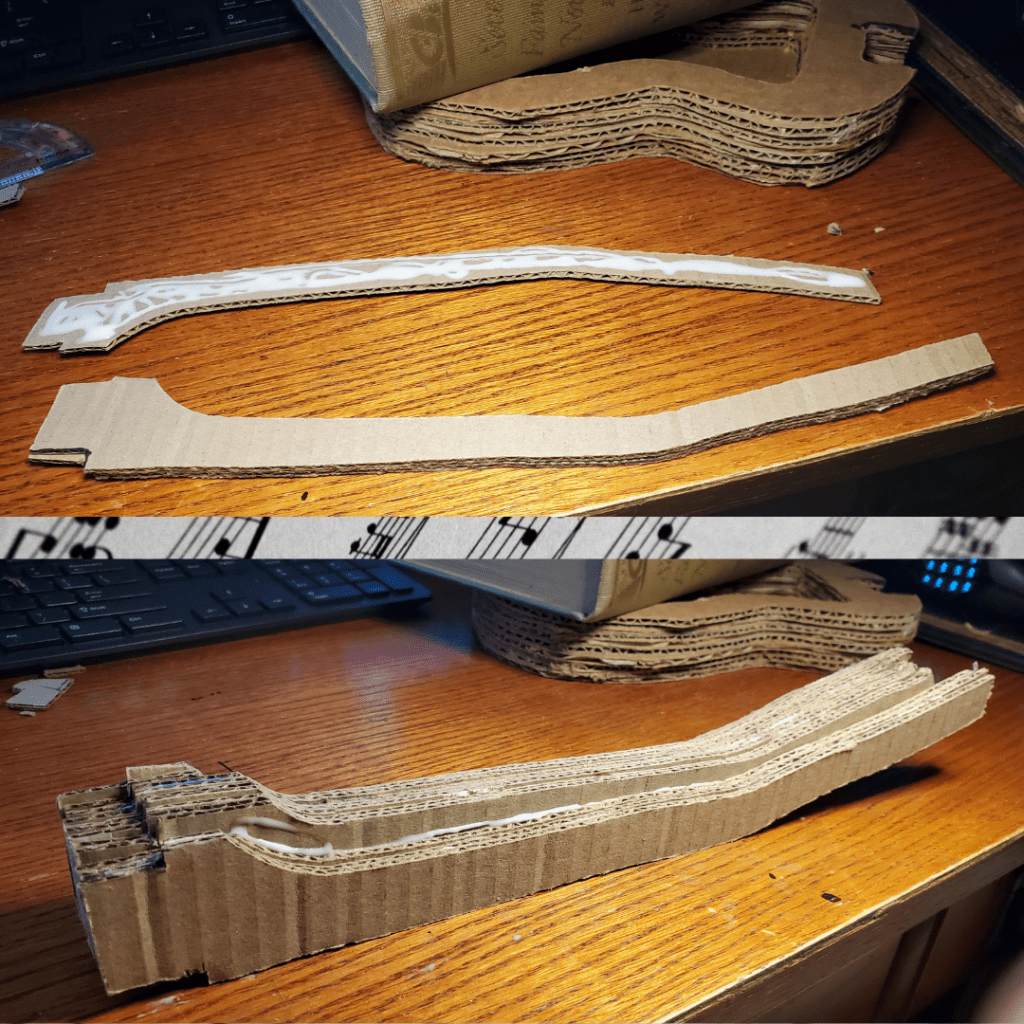
Glue Neck
Stack & glue Neck A & B pieces together. Neck B pieces are thicker. You want to make a rounded back of the neck, so put the thickest piece in the middle, with the pieces getting thinner towards the sides (ie, 3 Neck A pieces, then 7 Neck B, then 3 Neck A.). Stack and test out your pieces before gluing.
Also note that, depending on the thickness of each piece of cardboard, you may not need all 13 neck pieces. Check the fit of the stack within the notch in thebody.
As you glue the layers together, line up the edge that will notch into the uke as well as the fingerboard. Laying the neck with the fingerboard down is a good way to do this; you can leave it to dry in this position.
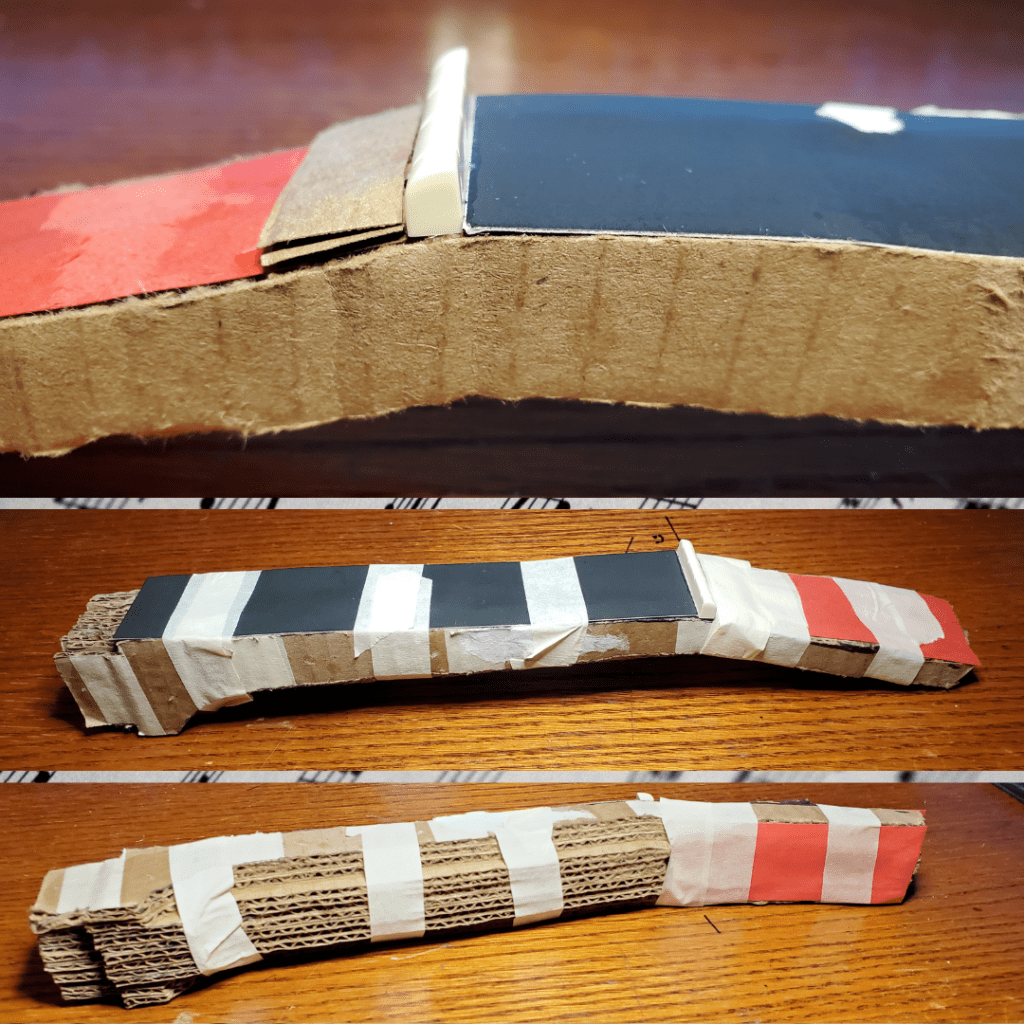
Cover Fingerboard and Headstock; Install Nut
HEADS UP: You’ll need to do this on your own after your neck glues overnight, so that we can get to installing the tuning pegs on Monday! This part is pretty easy. Covering the fingerboard and headstock gives a better surface for installing the fretboard and tuning pegs respectively.
Cut a rectangle the size of your fingerboard out of the black posterboard. You want the top of this rectangle to end just before the bend in the neck. You can use the fingerboard as a template for this by placing the neck upside down on the piece of posterboard . Make sure your corners are right angles. Glue the fingerboard to the neck.
Cut 2 rectangles the size of your headstock out of cardstock and glue them to the top and bottom of the headstock.
There should be a gap between your headstock and fingerboard coverings. This is where you’ll install the nut.
Cut a small piece of cardboard the length of the nut. The corrugation pattern should run lengthwise, parallel to the neck. This will be used to brace the nut in place. Glue the nut just above the fingerboard, and glue this brace just above it.
Tape the coverings, brace, and nut down to dry overnight.
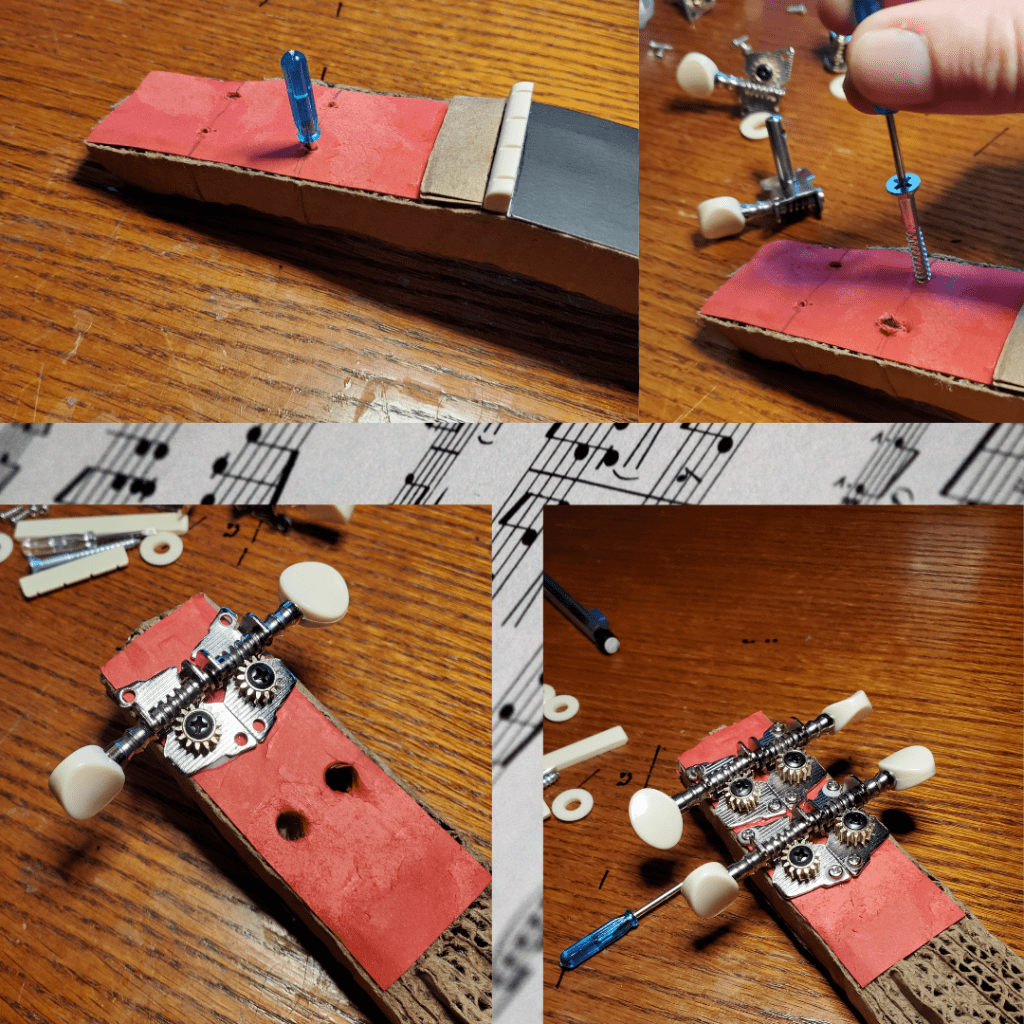
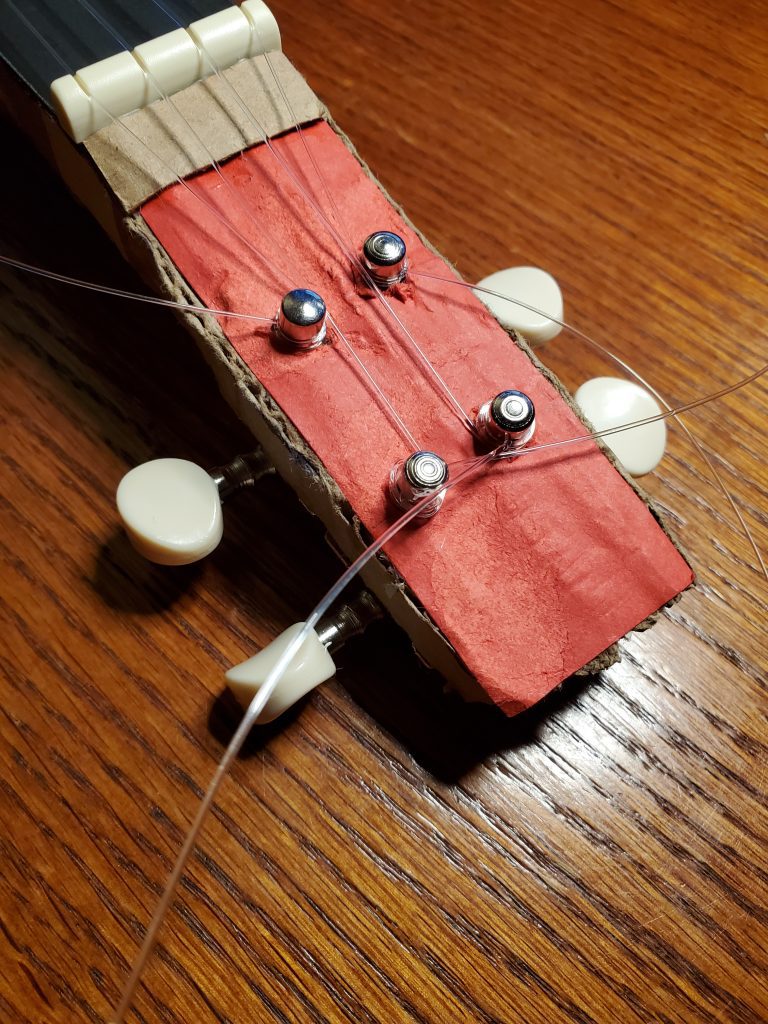
Install Tuning Pegs
On the headstock, mark 4 holes for your tuning pegs. Then use your mini screwdrivers to punch holes for the tuning pegs. You can then use the wood screw to further widen the holes if needed.
The holes for the tuning pegs need to be at least 3/4 inches apart from each other (side to side), and about 1.5 inches apart (top and bottom). You can draw a rectangle with these dimensions to get your marks.
Insert the tuning pegs into the holes with the gears on the bottom of the headstock, putting a little glue on them before inserting. Then use the screws included to attach the tuning pegs to the back of the headstock, putting a little glue on the screws before inserting.
Check the top of the headstock, ensuring that the string holes have enough clearance.

Install Neck and Soundboard onto Body
Test fit the neck in the body notch. If it is too large, trim even amounts of cardboard off either side. If it is too narrow, create shims to fill the gap on either side from composite cardboard.
Glue the neck into the notch in the body. While glue is still drying, install the screw through the back. Use the screwdriver to punch a hole first if needed. The screw should go through most of the neck, but not poke out of the top. This joint is very critical, so check alignment often during the gluing.
Apply glue to the top of the body stack and place the soundboard on top. Leave to dry in a stable position that holds the neck in place at the correct angle.
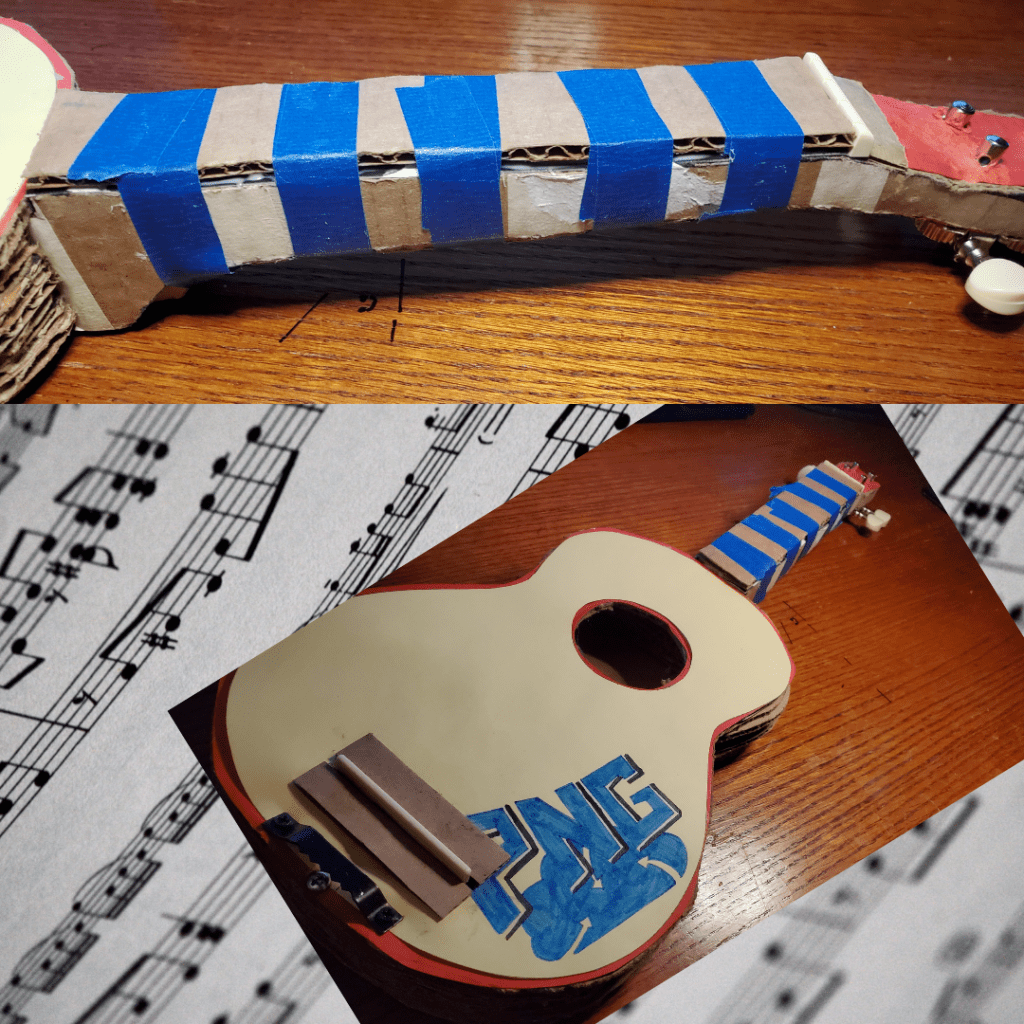
Install Fretboard
The action of an instrument refers to the distance between the fretboard and the string. To get the action right on our uke, and to give us something to attach the frets (cotter pins) to – or something to draw frets on, if you prefer a fretless instrument – we need to install a fretboard. Without the fretboard, the action will be too high (too much distance between the fingerboard and the string).
Take the extra piece of long cardboard in your kit and measure and mark to the size of your fingerboard. Make sure that the corrugation pattern is perpendicular to the neck; the holes on the side are where the frets (cotter pins) will slide in, should you chose to fret your instrument.
Glue the fretboard on top of the fingerboard; use some masking tape to keep it in place while drying.
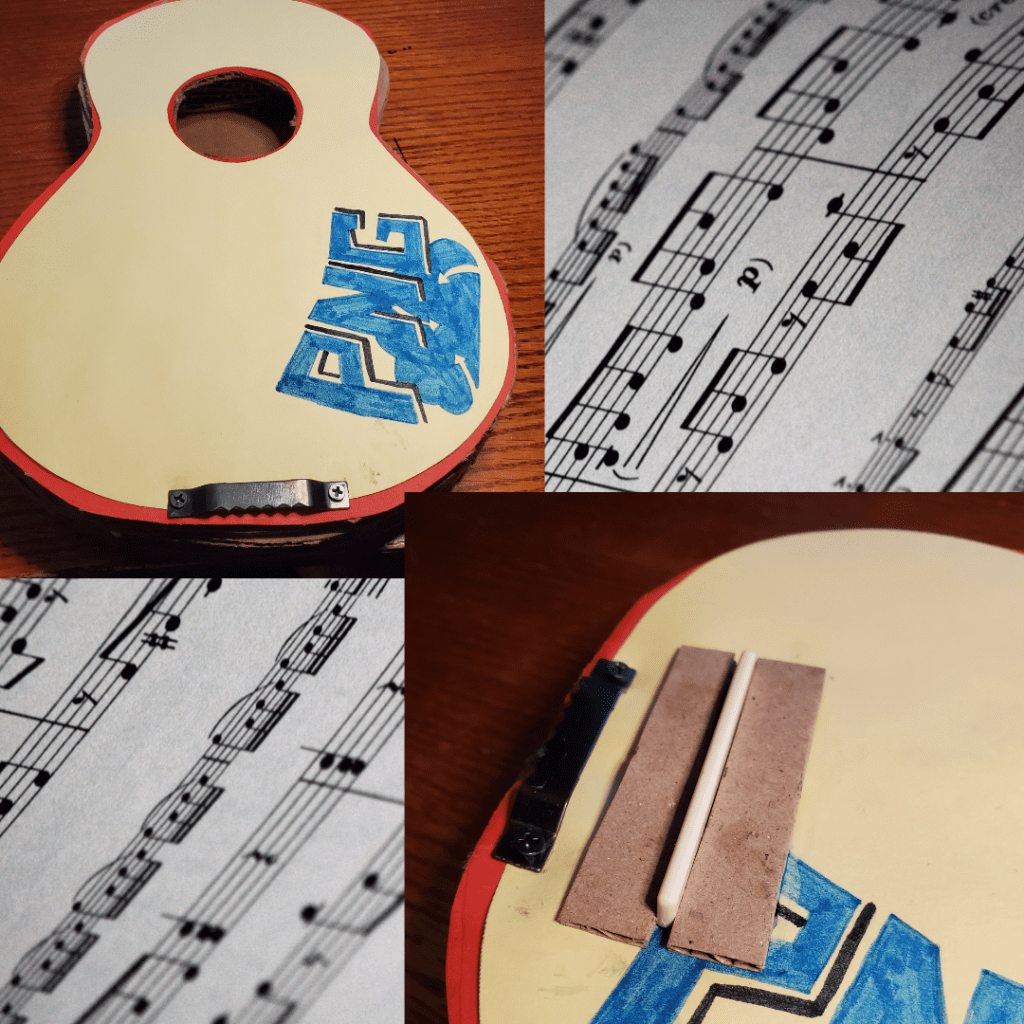
Install Bridge and Saddle
Your uke is taking shape! The next step is to install the bridge and saddle onto your soundboard. The bridge is where you’ll tie on your strings later. The strings will cross over the saddle, through the notches on the nut, and into the holes of the tuning pegs. The tension of the strings will help hold the nut and the saddle in place.
Get the bridge (sawtooth picture hanger) and its 2 screws out of your kit. Position the hanger on the soundboard, near the end of the lower bout (see picture), making sure that the screws will go through multiple layers of cardboard, not just the top. Once in place, use a pen to mark the holes where the screws will go (your bridge will probably move around as you screw it in so it’s good to mark!). Screw the bridge on, with a little bit of wood glue on the screws.
NOTE: You can try installing the bridge on the bottom of the instrument instead of the top, like in the original project. However, your strings may not be long enough!
Then, cut out 2 cardboard rectangles, about 1/2 inch wide and a little longer than the saddle. For strength, make sure the corrugation pattern of the cardboard runs parallel to the neck. These will be used to brace the saddle in place. Take one of the rectangles and glue to the soundboard, about 1/2 inch up from the bridge. Then glue the saddle and other rectangle down, with the saddle sandwiched between the two cardboard braces.
Calculate and Mark Frets
You’re almost there! You just need to mark your frets then string your instrument.
Measure the distance between the bottom of the nut (the side touching the fretboard) and the top of the saddle. Type in that number (MisLiz’s was 15.5), then for the number of frets, type 12.
Use a ruler to mark the frets on your fretboard.
If desired, install the cotter pins at each of these locations. The cotter pin will poke through each of the layers of corrugation in the fingerboard, so it will take some light pressure and some patience. If the pins do not lay flat, you may need to use some wood glue to hold them against the finger board. If you are going to use glue, be sure to double check your fret locations, you won’t get another chance.
String and Tune Instrument
All you need to do now is string your instrument! For the top (1) and bottom (4) strings, use the outermost notches of the bridge.
After tying a string to the bridge, you’ll thread it through a hole in a tuning peg. Wrap the thread around the peg a few times, making sure to wrap upwards, before tightening the string by turning the tuning peg.
Today’s standard soprano ukulele tuning is gCEA.