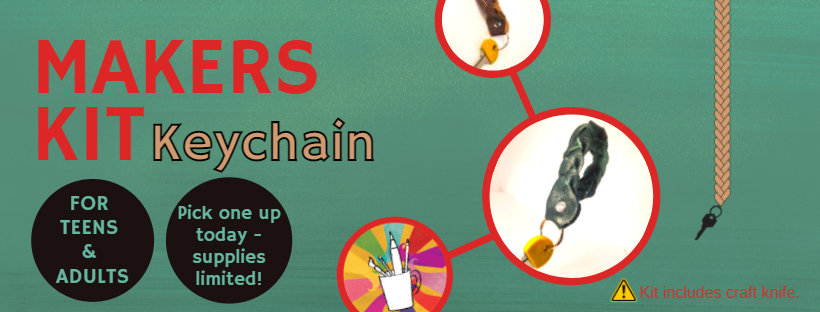
Make some magic with this magic braid leather keychain craft! Each kit has materials for 2 keychains. Gift one to a friend!
⚠️ CAUTION: Kit includes craft knife and requires use of a hammer. Not for younger patrons! Teens, ask an adult for help if you need it. Always be careful when using tools. Always make sure you’re working on a solid, stable surface.
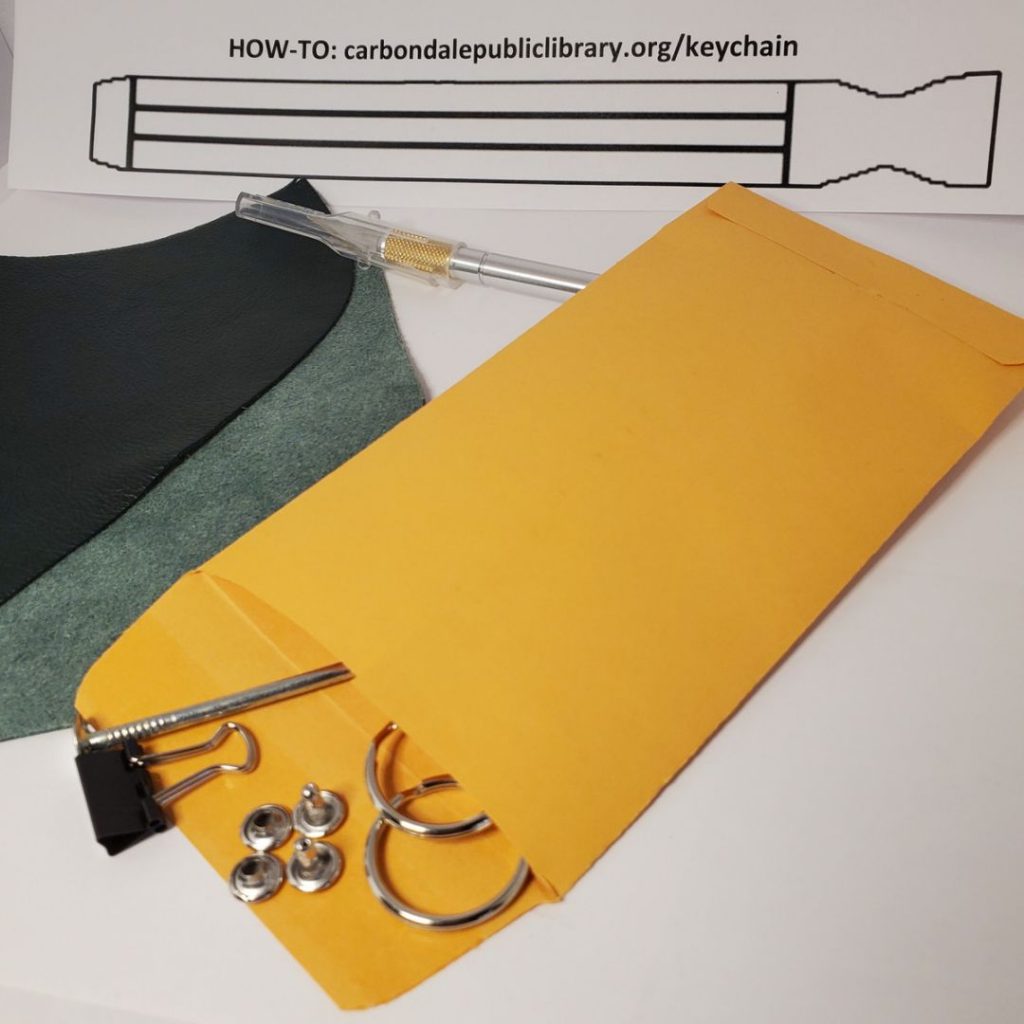
Your kit includes:
Supplies:
- Leather
- Paper template
- 2 rivet sets
- 2 split rings
Tools:
- Craft knife
- “Awl” (nail)
- “Clamp” (binder clip)
Before you begin
There are several tools of your own to gather:
- Hammer (will be used as a rivet setter)
- Cutting board or mat
- Scissors
- Pen
You will also need to find a place where you can hammer in a nail. A piece of scrap wood or even a tree would suffice!
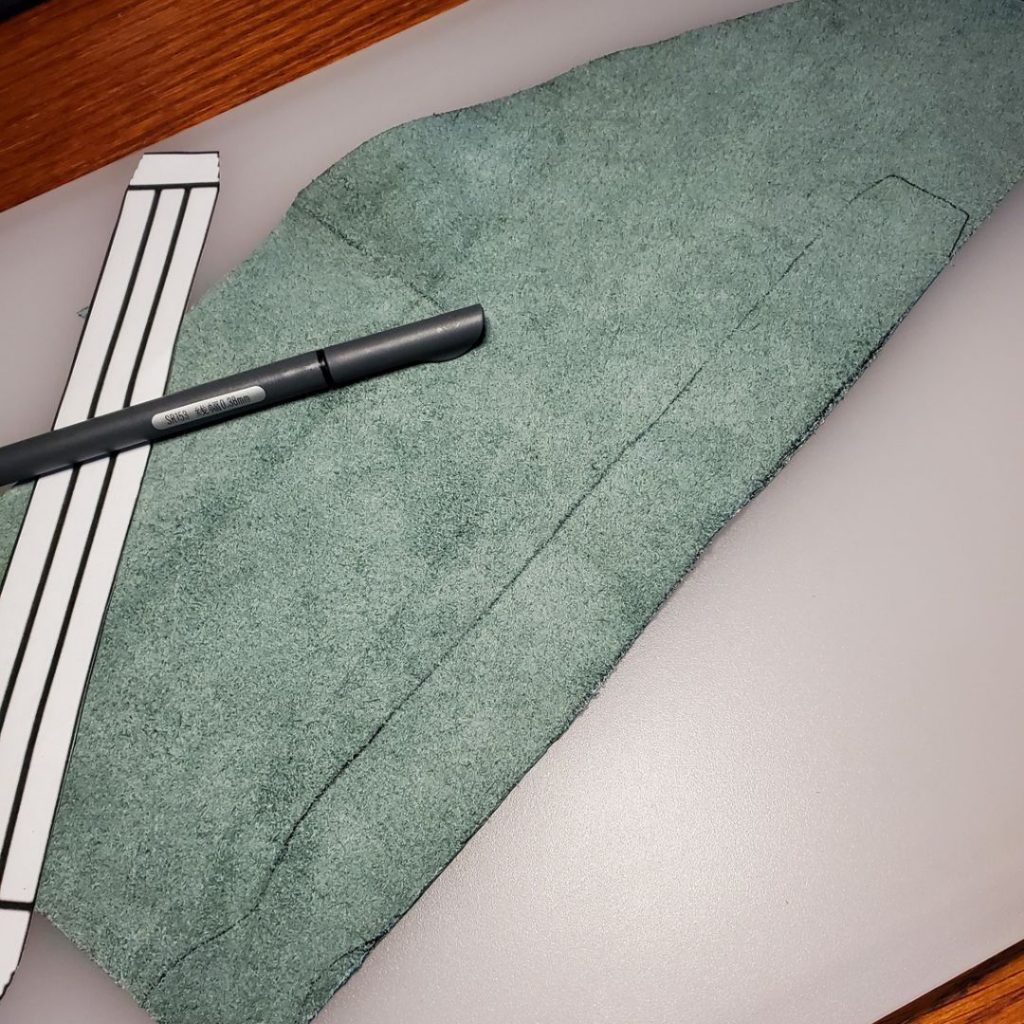
STEP 1: TRACE & CUT OUTLINE
Cut out the paper template. Place the template on the back of your leather scrap. Make sure to strategically place your template so that you have enough to make a second keychain. Trace the outline onto the leather with your pen.
Cut the leather along the traced outline. You can use the craft knife or scissors.
⚠️ CAUTION: Use a cutting board when using the craft knife. Carefully tighten the blade screwed into the handle. Always put the cap back on the knife when not in use.
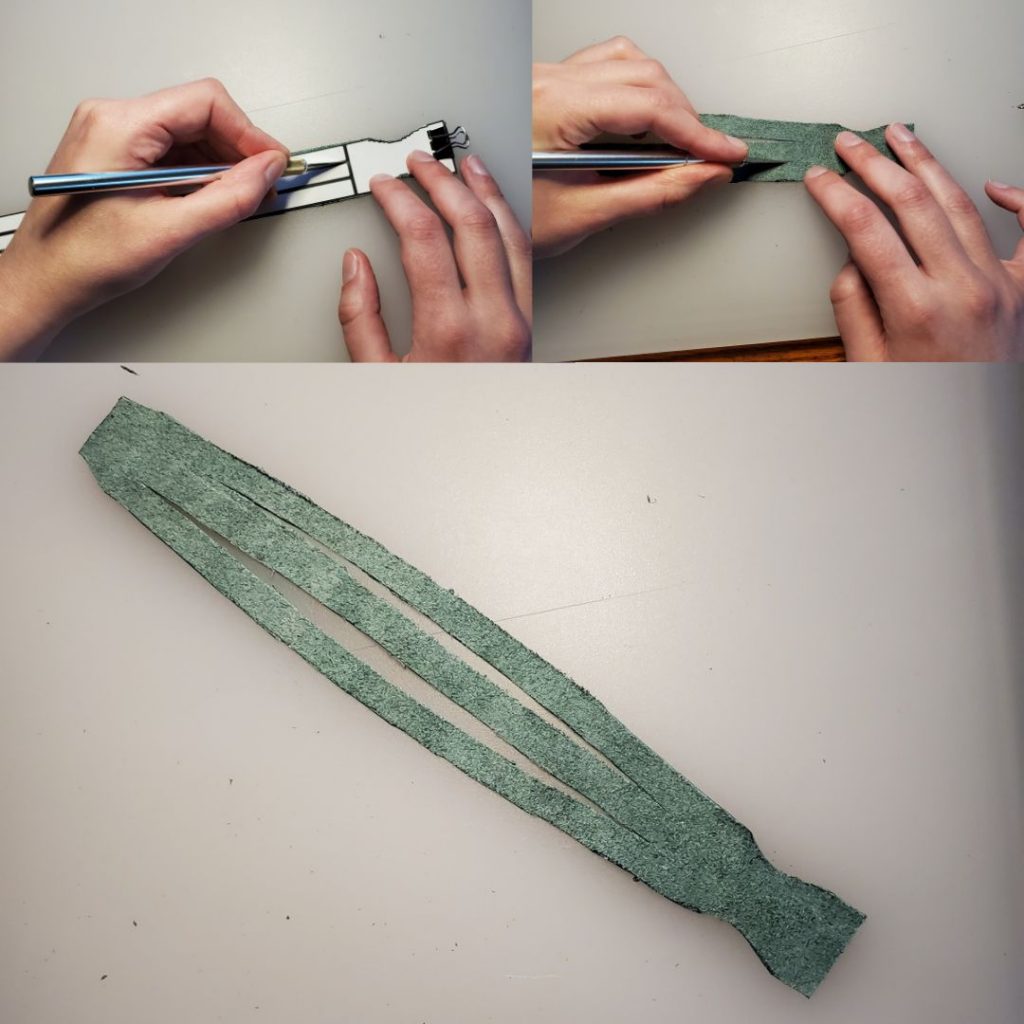
STEP 2: CUT BRAIDING SLITS
Put the paper template back onto the back of your keychain. Use the craft knife to score the leather along the 2 lines in the middle of the template. Remove the template. Cut through the leather along the scored lines, making 2 slits. Your keychain now has 3 strands in the middle, but no loose ends.
💡 TIP: Use the clamp to keep the template in place while you score.
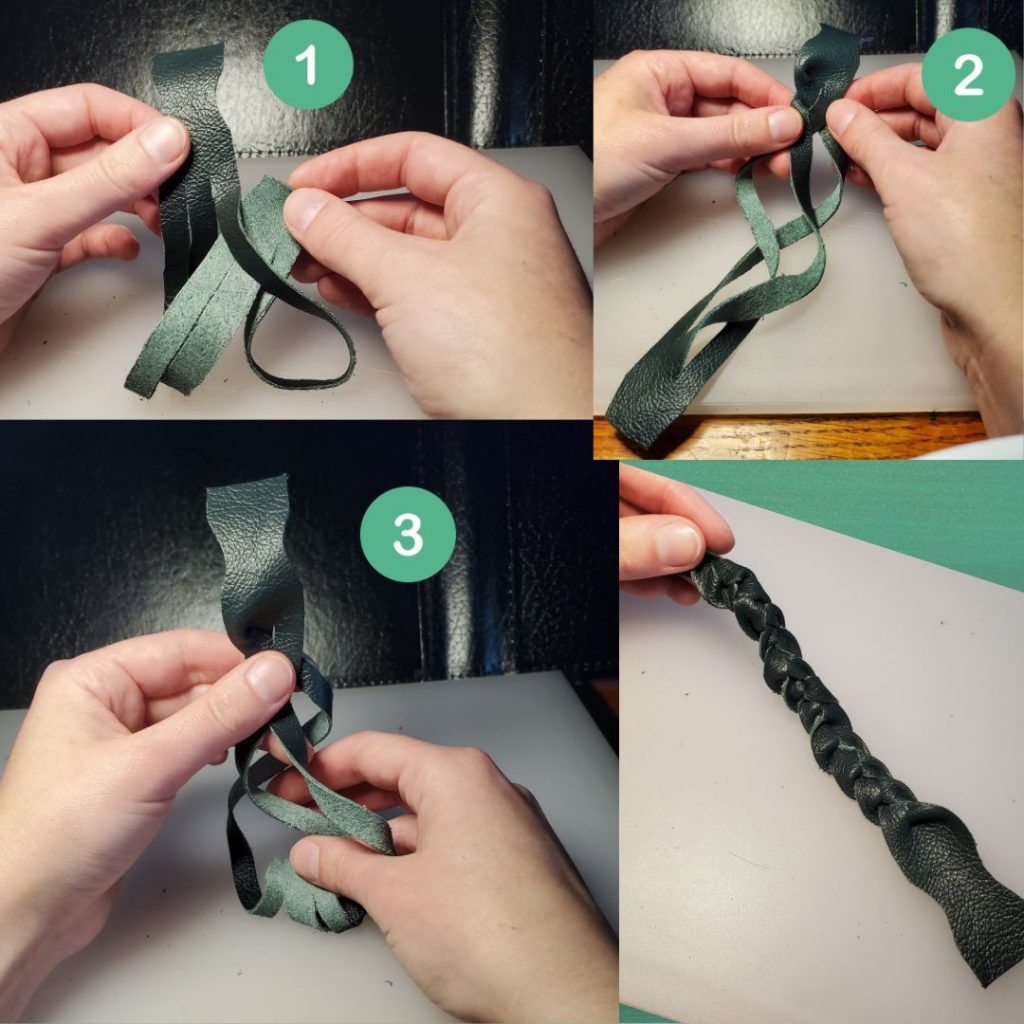
STEP 3: BRAID
First, pull the bottom end through the top of the right-hand slit.
Then, starting from the left side, braid 3 times (left-right-left). Pull the lower end through the left slit, directly under where you just braided.
Then, do another braid and pull from the opposite side (braid right-left-right and then pull the lower end through the right slit). Repeat this process until you have a closed braided tape (about 3 times).
💡 TIP: Work out the strands of the braid as you go, so that the braid lies as flat as possible and the back side of the leather is only visible on one side of the braid.
It’s okay if you have to try a few times to make this work! You can always unbraid it and start over. Having trouble? Check out Weaver Leather Supply’s great video on magic braiding!
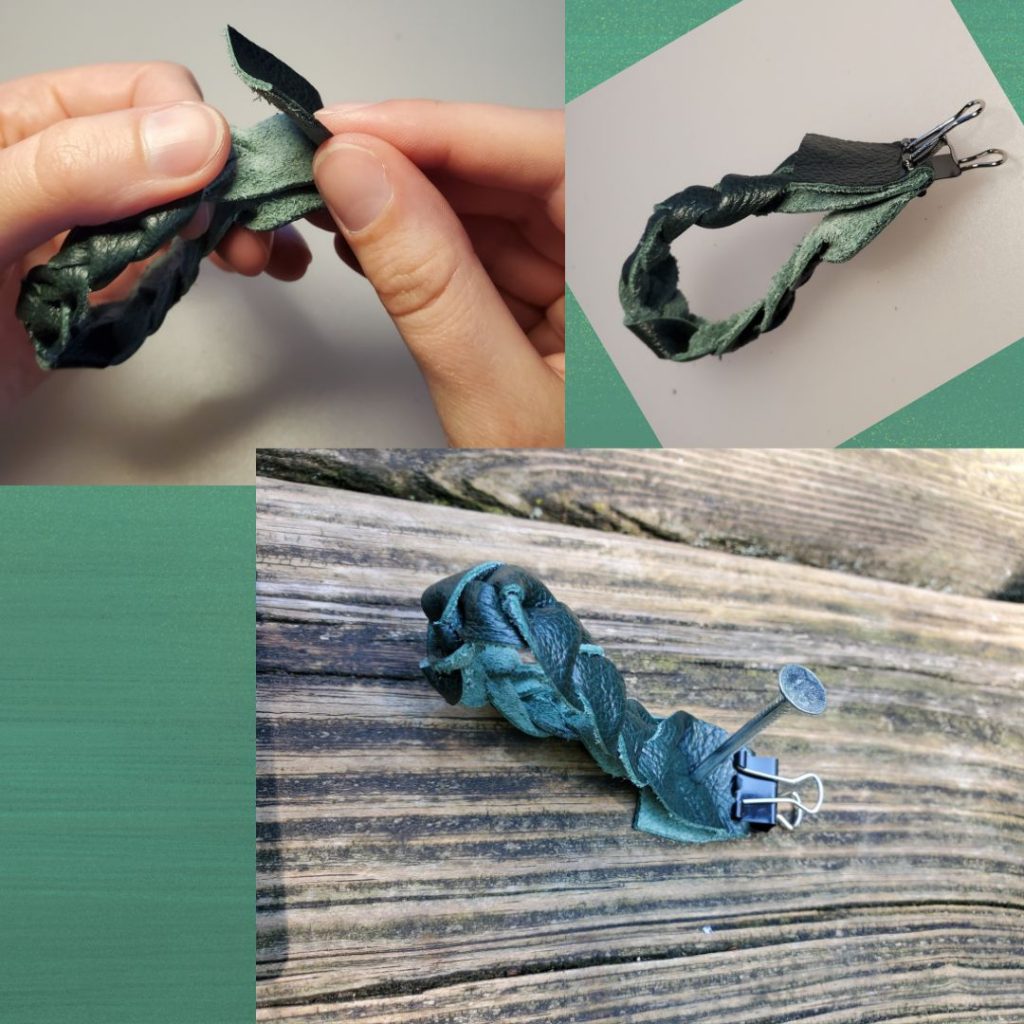
STEP 4: PIERCE RIVET HOLES
Form your braid into a closed loop. Fold the top tab over the bottom end, so that the bottom end is sandwiched between. Secure with the clamp.
Use the awl and hammer to pierce through the 3 layers. Make sure you get all the way through! Then remove the awl, using the back of the hammer if needed.
⚠️ CAUTION: There will be a hole in whatever surface is underneath your keychain. Don’t do this on a nice piece of furniture!
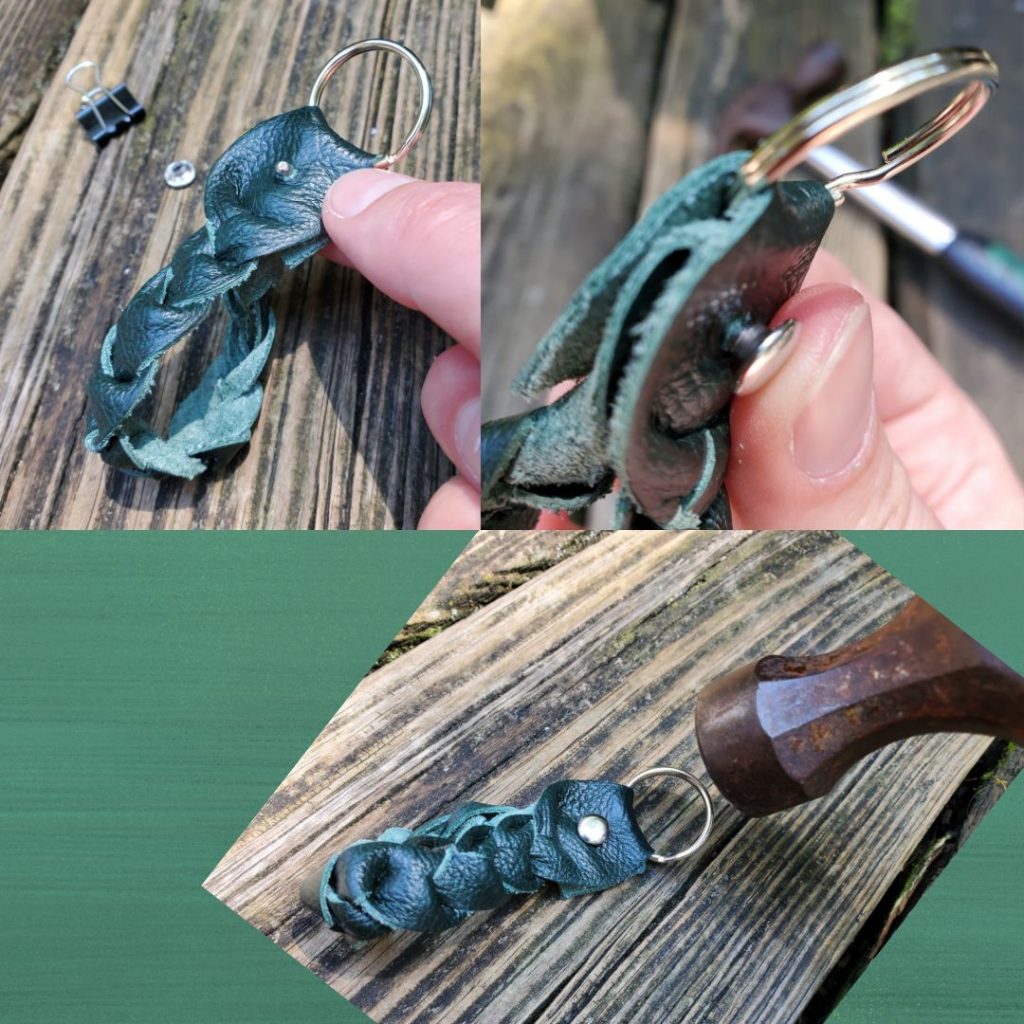
STEP 5: SET RIVET
Place the split ring within the fold of the top tab. Take the rod rivet piece and push through all 3 layers as assembled in the previous step.
Place the cap rivet piece on the other side.
Set the rivet with a hammer. Hammer on both sides to ensure a tight fit.
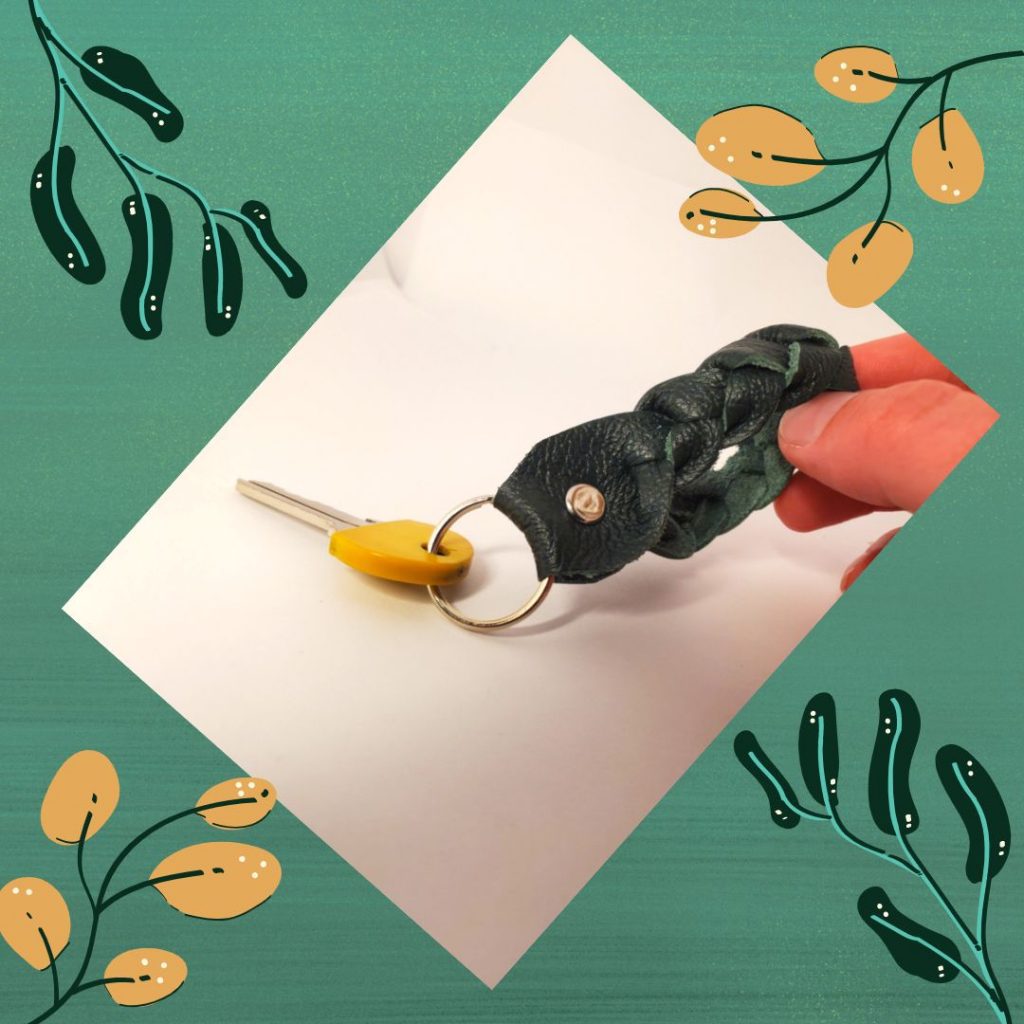
STEP 6: FINISH AND ADMIRE!
Arrange the strands as needed for a cleaner look. Trim any stray pieces of leather.
Good job! Now you can make a matching one for a friend!